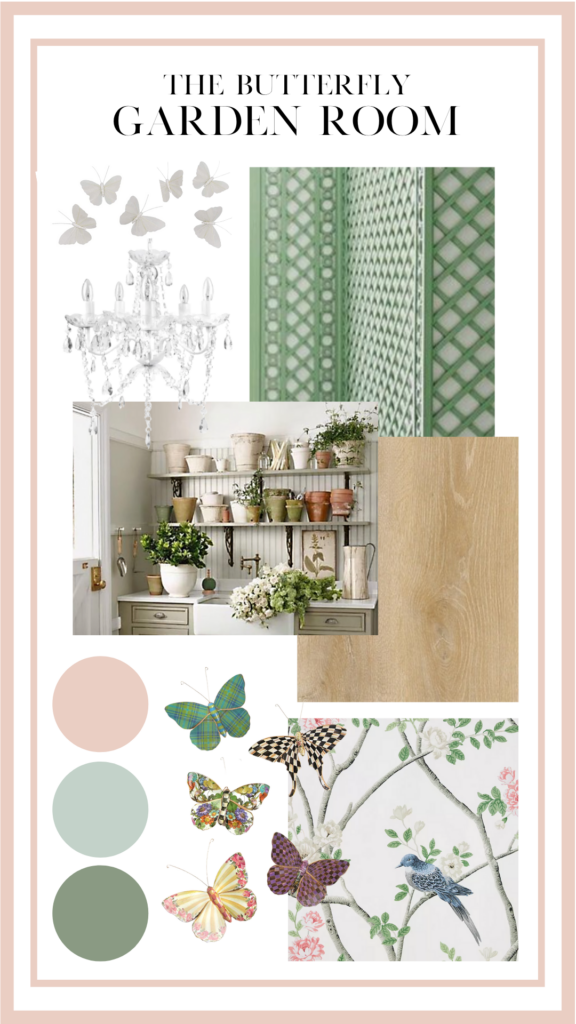
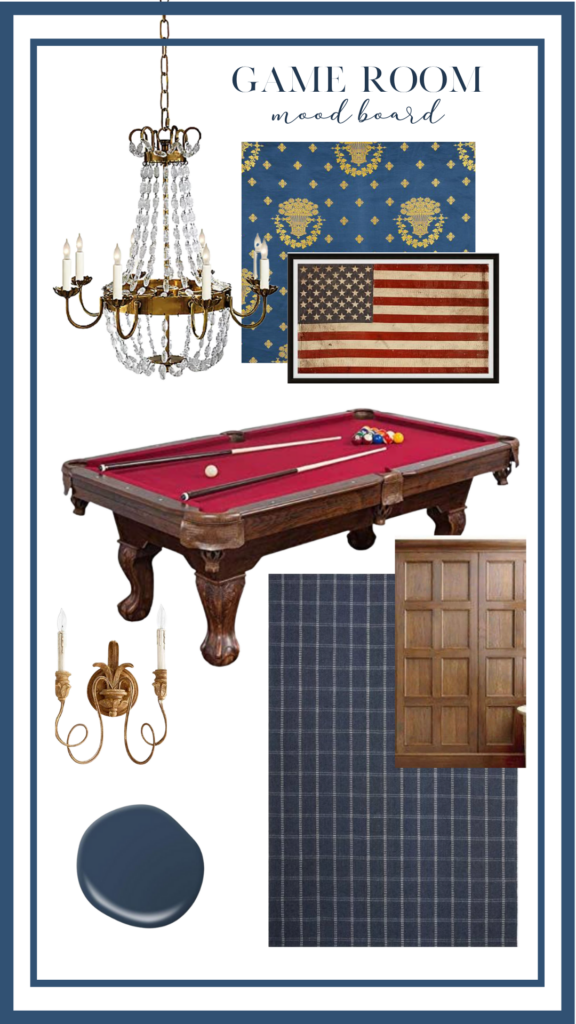
Before starting any new project, my favorite thing to do is sit down and create a mood board. It’s the perfect way to get all my ideas in one space and see the complete look I’m going for. After years of sharing these mood boards with you all, it’s amazing to see you love them as much as I do!
Here are a few of my favorite mood boards:
I get questions all the time on how I create these mood boards and although I’d love to sound really tech savvy, it’s just with Canva! For years though (and still on occasion), I use photoshop if I need a special feature but 99% of the time my graphics are made on Canva.
Today on the blog, I’ll be walking you through a tutorial on how to create a Canva mood board for yourself! I use Canva for so many other projects too, so hopefully you feel inspired to test out something new.
What Is Canva?
Canva is a user-friendly graphic design platform that makes creating any sort of digital design super simple. The platform itself is free, but also has a paid option with more templates available and an easy to blur background that’s great for mood boards.
Many of you know, home renovation projects started as just a passion of mine, so mood boards were just paper scribbles for a long time. Eventually, I saw professional designers create these stunning mood boards and thought there has to be a way for me to do it myself. Canva was the answer!
There is little-to-no learning curve for Canva (it truly is that easy), so I’ve been creating and slowly evolving these mood boards for years. Finally, I’ve mastered the style I love and had to share it with you all!
How To Create A Mood Board
- Choose Your Canva Template
For me, I prefer a blank canvas, so I choose to make it the size of my computer screen and if I want it horizontal or vertical. You may want to scroll through their premade templates first and by all means do so! - Screenshots Are Key For Your Canva Mood Board
Screenshots are the easiest way for me to add in photos of the pieces either I already have, or want to bring into the space. It can be done in 4 easy steps: pull up the piece you’d like to screenshot. On your computer, hold keys: shift, command, 4 to bring up a toggle of what you’d like to screenshot. Rename to something easy to find on your desktop. On Canva, click the left-side menu on the item labeled Upload. - Start With Pieces Essential To The Space
For each one of my projects, there tends to be a few special pieces or items that I know will be included in the space. These should go on your mood board first. I like to have the biggest statement in the center, but any other essential pieces in the upper or lower corner areas. - Play Around With Photos To Create A Vibe
Now that the for-sure pieces are in the mood board, this is the fun part! Start shopping online, browsing Pinterest, and really just seeing what vibe you’re drawn towards. I spend a lot of time uploading, deleting, and moving photos around to truly understand how pieces look together. - Colors Finish Off The Perfect Mood Board
Canva allows you to add in any colors as a background, text, or even graphics through their color dropper tool and premade color palettes. I use both and love the customization of finding the specific color in a photo, or finding a finishing touch for the vibe.
After a lot of fiddling around to make it perfect, your Canva mood board is ready!
Other Projects I Use Canva For
While my mood boards definitely take the cake for my most-used design project on Canva, I do love creating a ton of other fun projects with it. Here’s a list of my favorites:
- Invitations
- Instagram story posts
- Fun printables (like my cleaning list!)
- Any sort of lettering
And I’m sure I’ll find a ton of other favorite projects down the line that will bring me back to Canva. As someone is doesn’t consider themself to be really techie, I love using it so much!
Have you ever used Canva for a design project? Please let me know in the comments! And to keep up with everything on the blog, check out my latest posts:
Hi Mallory,
Which blank template do you use? The first one I tried didn’t allow me to move the pictures around. Thanks!
Oh no! When you first login, you should be able to choose any size template you’d like.