You know I love a big DIY project, but even I was a bit intimidated by our kitchen renovation. Luckily, I found the perfect middle ground between hiring a cabinet maker and building them from scratch: RTA cabinets! Here’s how I chose our cabinets from RTA Cabinets and created exactly the look I was dreaming of.
- Our Kitchen Remodel! (full kitchen sources here!)
- All About Our Wall Mural
- How I Added A Runner To Our Kitchen Stairs
- How I Cut Our Kitchen Countertop Quote In HALF!
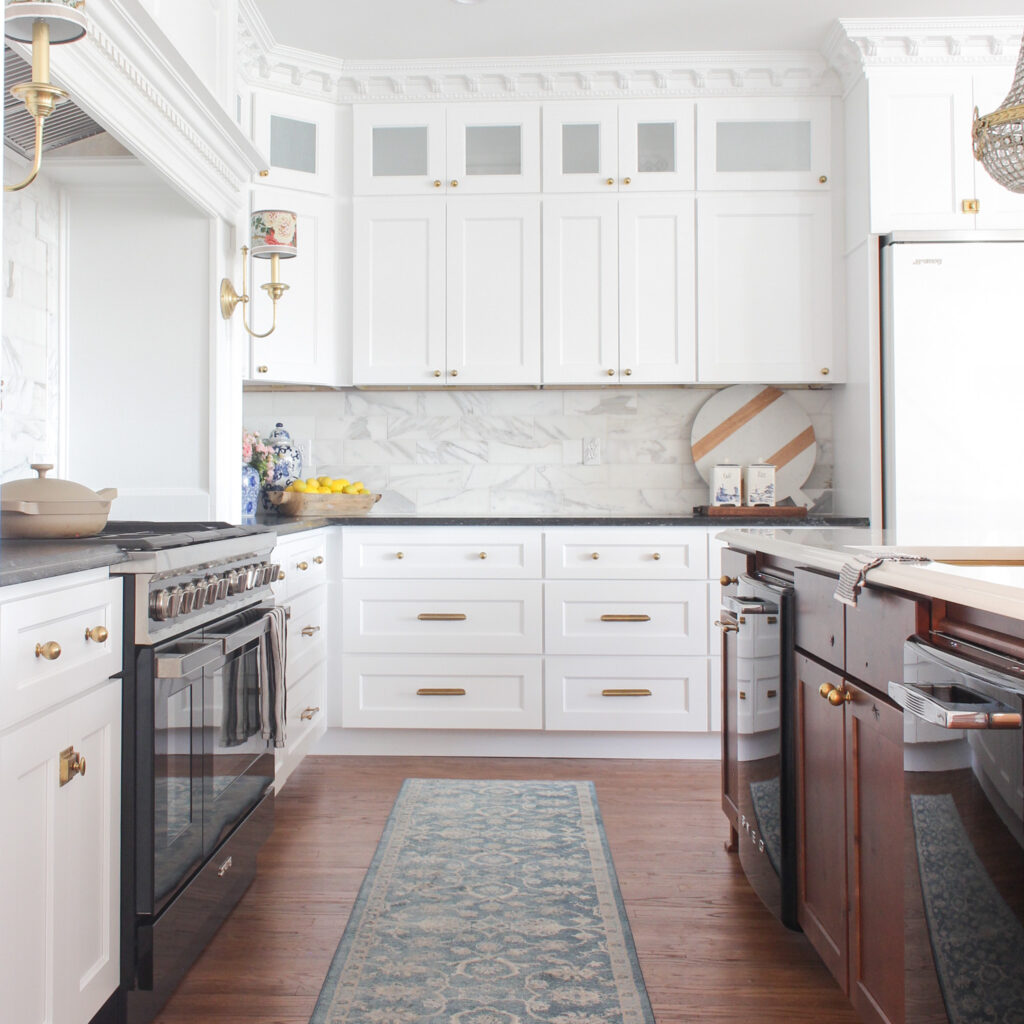
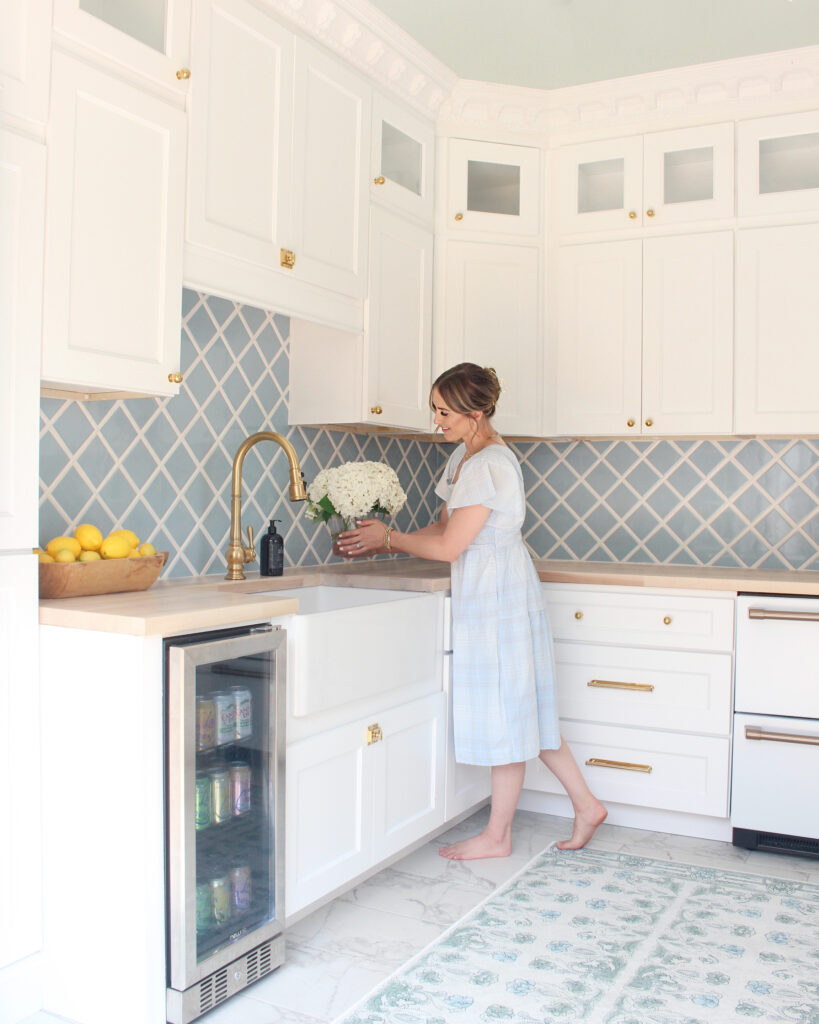
We’ve done two amazing projects using RTA Cabinets in our home – our kitchen and our pool house kitchenette!
Why I Chose to Use RTA CabinetS
I knew I wanted creative control with our new kitchen, but I also knew I didn’t want to pay for custom cabinets. Nor did I want to wait MONTHS for them to be built. While custom would be nice, it would take up the bulk of our kitchen budget. Instead, I started researching other cabinet options.
We went the custom cabinet route in our last home in Arizona and I LOVED the end result. Every single detail was just stunning! The cost of our cabinets is more than I wanted to allocate in this home (as we have other projects in the pipeline), but I didn’t want to sacrifice on the quality either. I knew I wanted ALL wood, no particle board, MDF, fiberboard etc. This was mandatory. I started researching cabinet boxes and thought I could order custom doors if needed. I stumbled upon RTA Cabinets online and ordered sample doors immediately.
You can order 2 free sample doors here with my code: SAMPLESMN
RTA Cabinets come with everything you need to build and install your own cabinets. Not the tools of course, but all the wood, screws, etc. Usually, they consist of plywood boxes and solid wood doors. After doing my research, I decided that a RTA cabinets would offer nearly as much creative freedom as custom cabinets without the insane price tag. I’m literally saving tens of thousands of dollars installing them myself!
My Experience With RTA Cabinets
In the end, I decided to go with RTA Cabinets for my kitchen cabinets. Here’s what I love about them:
- Their sturdy construction. Seriously, these cabinets are heavy. Plus, with their dovetail doors, I have no doubts they’ll stand the test of time! The boxes are made of 1/2″ plywood and have pre-made dados (a very strong joint for the cabinet sides)
- Soft close doors and drawers. This was really important to me. Every door and drawer in the new kitchen with have soft close hardware. This comes standard with the cabinet line I chose so I loved that.
- The solid wood, full overlay doors and frames. Plywood boxes are extremely sturdy. The face frames are made of 3/4″ plywood and the full overlay drawer fronts and doors are soldi wood.
- Lots of color and style options. I don’t feel like I’m missing out by not going with custom cabinets. RTA has so many options to mix and match, I truly feel like I’m customizing my look.
- They ship fast! Who doesn’t love that?!
Overall, I can’t recommend RTA Cabinets enough. If you want to create a unique look without paying custom prices, check them out!
Elevating RTA Cabinets: Achieving a Custom Look for Less
Adding Custom Crown Moulding and Trimwork:
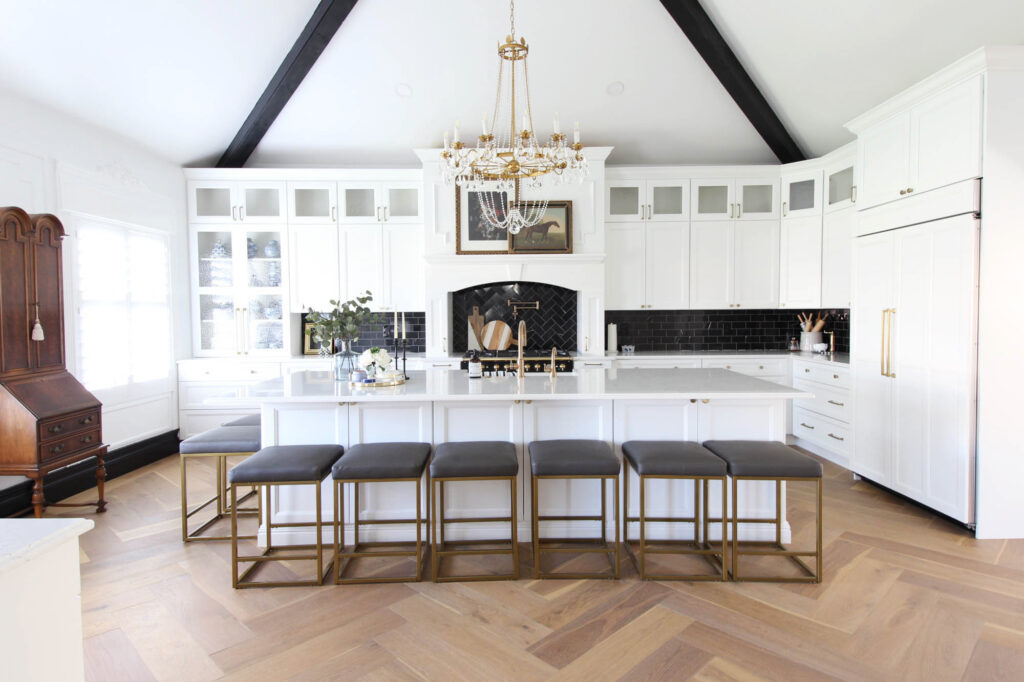
One of the first things we tackled in both our kitchen and pool house was the addition of custom crown moulding and intricate trimwork to our RTA cabinets. This seemingly small touch brings an element of sophistication and luxury, framing the cabinets beautifully and giving them a high-end look without the extravagant price tag.
Using Contrasting Island and Perimeter Cabinets:
One of my favorite design tricks to create visual interest and depth in your space is to use contrasting colors or finishes for your island and perimeter cabinets. For instance, opting for a dark-stained island amidst a sea of white or light-hued perimeter cabinets creates an amazing focal point. It’s unexpected in the BEST way!
Accentuating with Mixed Hardware:
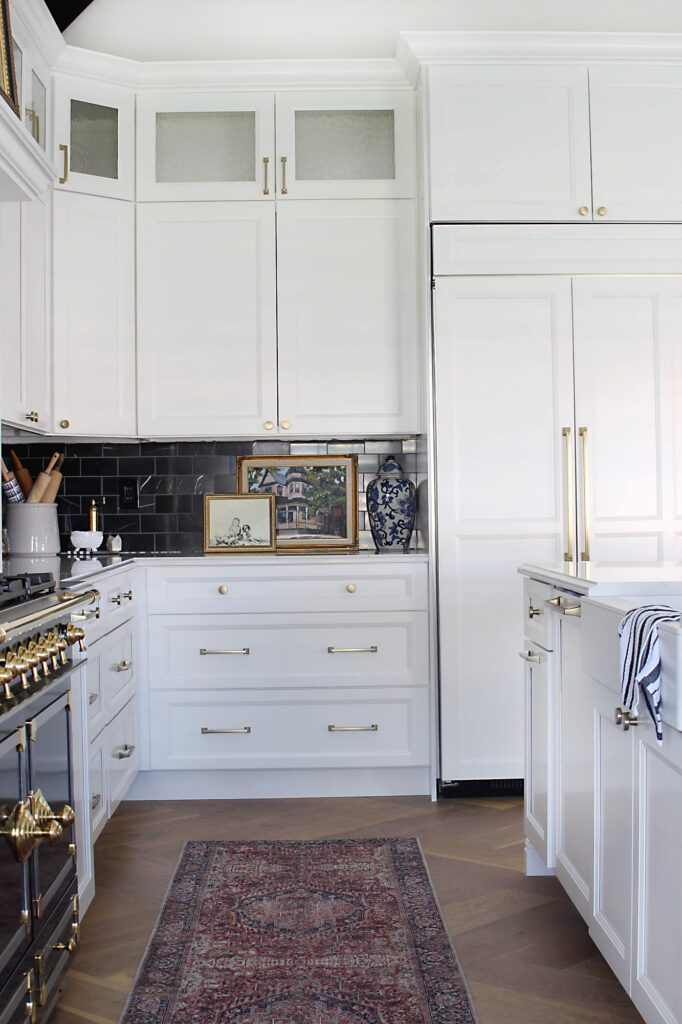
We chose to switch up our cabinet pulls and knobs, combining different styles. While we kept to brass in these projects, mixing metals is both art and a science that gives a designer look when done right. This subtle mix adds character and makes each section of the cabinetry feel special and unique.
We used a combination of knobs, pulls, and cremone bolts.
Hardware:
Stacking Cabinetry to the Ceiling:
To fully utilize space and add a touch of grandeur, we decided to stack our cabinets up to the ceiling. Not only does this provide extra storage, but it also draws the eye upwards, creating an illusion of higher ceilings and a more expansive space. This was a must, for us!
Adding Decorative Film to Glass Doors:
We added decorative film to our glass cabinet doors that is one of my favorite details in the whole house. This not only offers a hint of privacy for the items inside but also turns the cabinets into statement pieces, bringing a vintage feel that you know I love!
By integrating these details into our RTA cabinets, we transformed them from basic to (in my opinion) breathtaking. It’s the ultimate way to get the custom cabinet look for less.
My Kitchen Design Featuring RTA Cabinets
Now for the fun part! Once I decided to go with RTA Cabinets, I was able to put together the perfect kit for my kitchen design. Here’s what I went with:
For our perimeter cabinets, I ordered white shaker cabinets (Florence White) with a subtle beaded detail in the inlay. They look super classic, and I know the white will keep our kitchen looking bright and open.
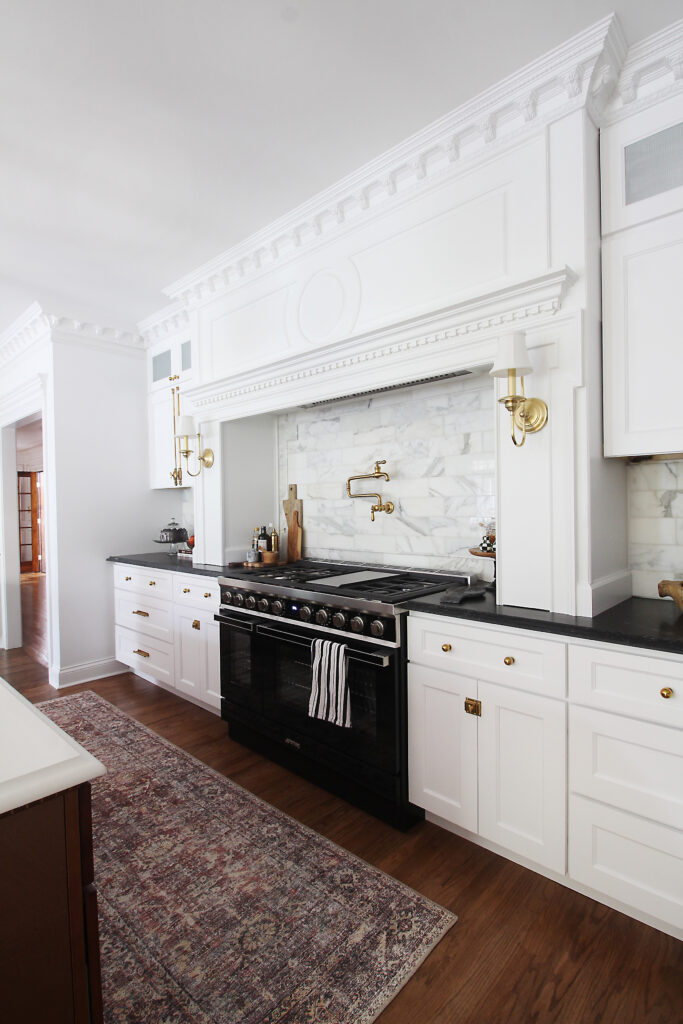
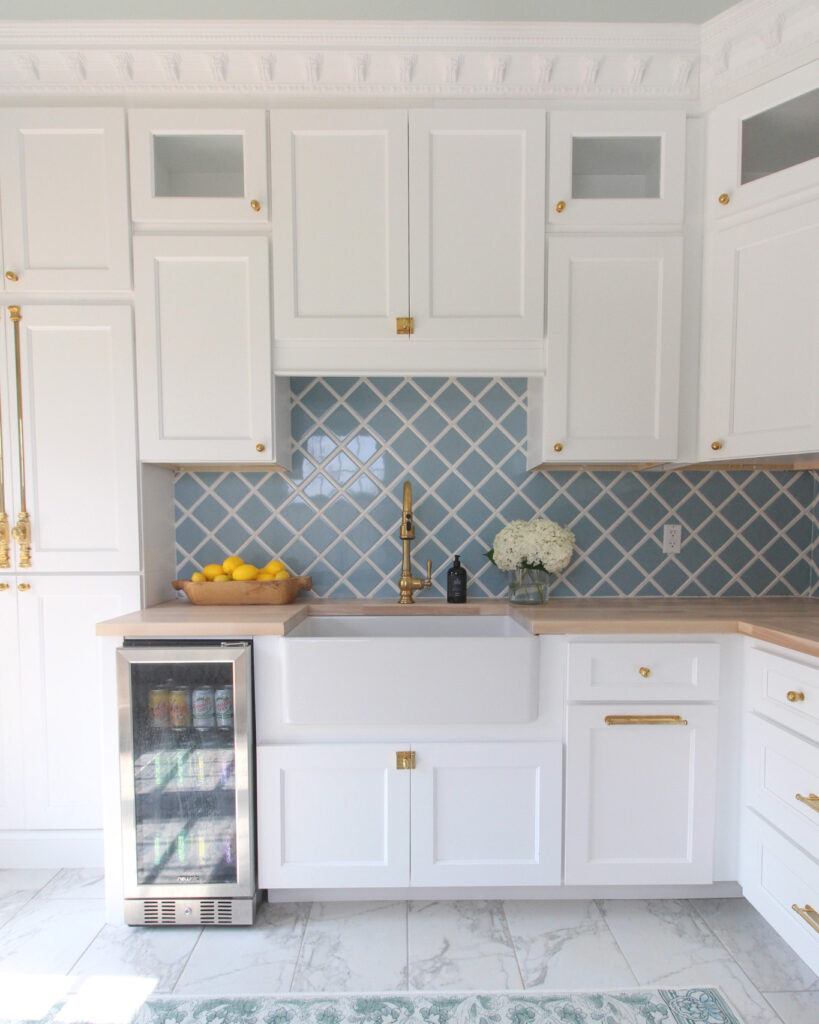
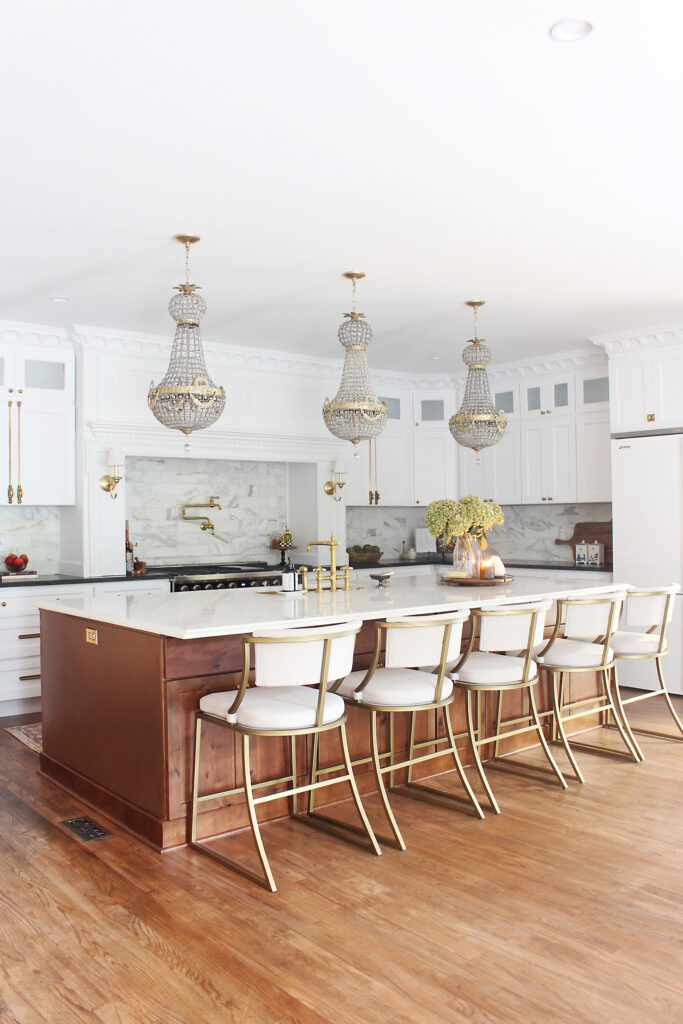
For the island, I wanted something a little more bold. That’s why I chose these walnut doors. I love the natural wood texture, and I think they’ll add the perfect rustic English touch of character to the space.
And of course, I had to pick out my hardware and countertops! While I’m not installing the countertops myself, I did choose them and all the hardware. I went with a brushed brass color for all the metal and these countertops. I did a marble backsplash to match the countertops and decorated the space with tons of bronze accents and vintage touches.
Don’t be afraid to get your hands dirty!
I know installing your own kitchen cabinets is a major undertaking, but it’s so worth it! Do your research, create your vision, and get to work!
If you’re interested at all in doing this yourself, grab some free sample doors with my code SAMPLESMN. I can’t recommend them enough!

Hi,
Where is the decorative crown molding above your hood range from ?
Home Depot 🙂
Hi, could I ask where your kitchen island chandeliers are from, they’re beautiful.
Also, how do you like having wood vs tile in the kitchen. Lastly, how do you clean your wood floors? I have both and feel wood is harder for me to clean. Thanks and Merry Christmas.
Hi Kym! They are from Etsy! I’ll link them. I love having wood in the kitchen! I see how tile would be easy to clean, but I’ve had wood or engineered wood in my last two homes so it’s just something I used to. And I love the the look, too 🙂
Hi,
Your kitchen is stunning! I’m about to start a project with RTA cabinets for my pantry and need to get a staple gun. Can you share what you used and what type of staples?
Can you please point me in the direction of how you panel covered your ice maker? I loved it but can’t remember how you did it!
I bought a RTA Cabinet that was the same width as my ice maker and used the face frame, door and drawer front to build my own panel. 🙂
When you say the kit comes with everything you need to build the cabinets, do you mean even glue, and clamps, etc.? If not, what would you say is the list of tools to have to assemble the cabinets?
It does not come with tools. It comes with all the pieces for the full assembled cabinet. You will need a few tools, staples and glue. It does come with the hinges, screws etc.