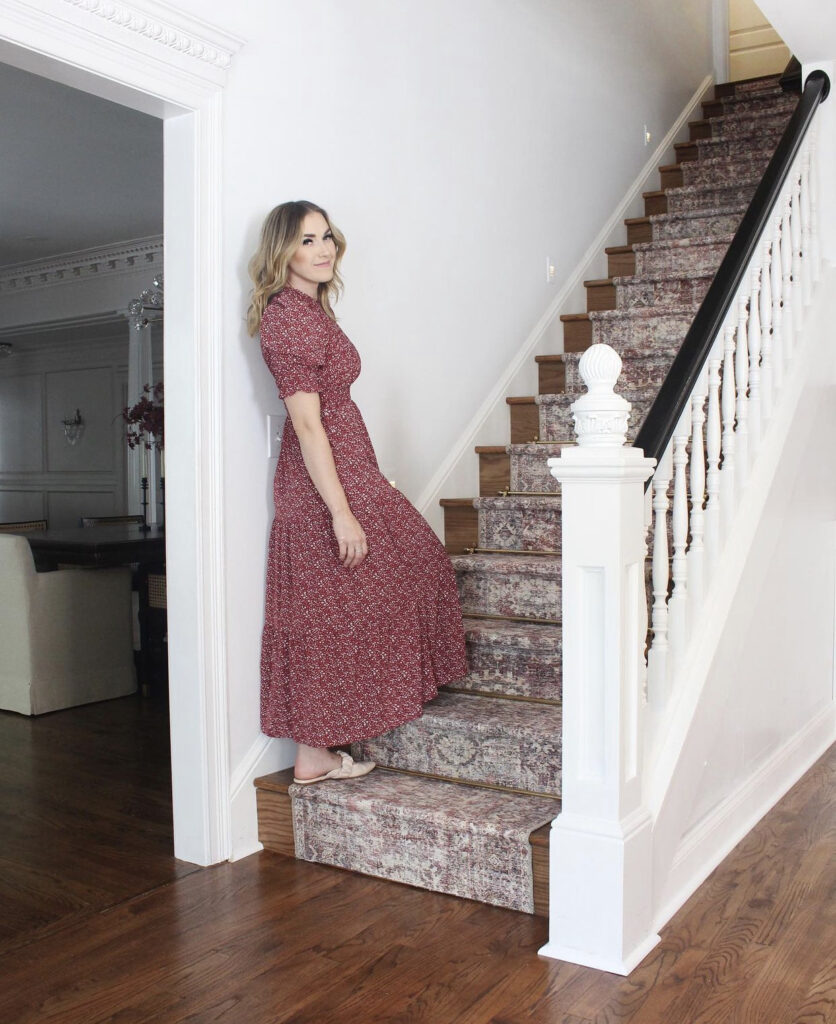
It’s safe to say that our kitchen stairs have been a labor of love. From starting and restarting the stairs themselves to installing the stair runner, this project is one for the books!
I am so proud to show off our “90s sitcom stairs” as we lovingly call them. Today on the blog, I’m sharing my stair redesign process plus all my tips to installing a kitchen runner!
The one where I had to start over
Initially, I had this grand idea to paint the stairs. I wanted the colors in the rug to pop against the white paint and after the first coat I had immediate regret. I couldn’t quite figure out what wasn’t sitting well with me, but something didn’t look right.
I had a decision to make – redo the stairs with wood stain or try another color. I didn’t want to waste any more time (or paint), so I did what I thought was best – start over! That meant demo on the stairs and rebuilding them to match the existing floor. Best choice ever!
Even though it was a bit annoying to do this project twice, I’m really happy with my final decision. Now came my favorite part: installing the stair runner!
Installing The Stair Runner
After the stairs were finally ready, I was giddy to get this stair runner installed.
This project is fairly simple once you get the hang of it, but can be time consuming to make sure everything is laid down correctly. In the end, I don’t even think about the time I spent doing it, just how gorgeous it is in our home!
Gathering The Tools And Materials
The hardest part of this project is choosing a runner! The one I found proved to be an incredible neutral color, but still with an intricate pattern to catch the eye.
Here are the links to all the tools and materials I used:

Stair Runner Prep Work
Although the prep work for this project is minimal, it’s still important to take the time to do it correctly. This way, you can ensure your stair runner will look flawless for years to come. Don’t skip the prep!
Start With A Good Cleaning
No DIY project should begin without a good cleaning – your stairs are no different! Rug tape is needed on each and every step, so ensure it sticks by removing any dust and dirt first. Trust me, you’ll be glad you did.
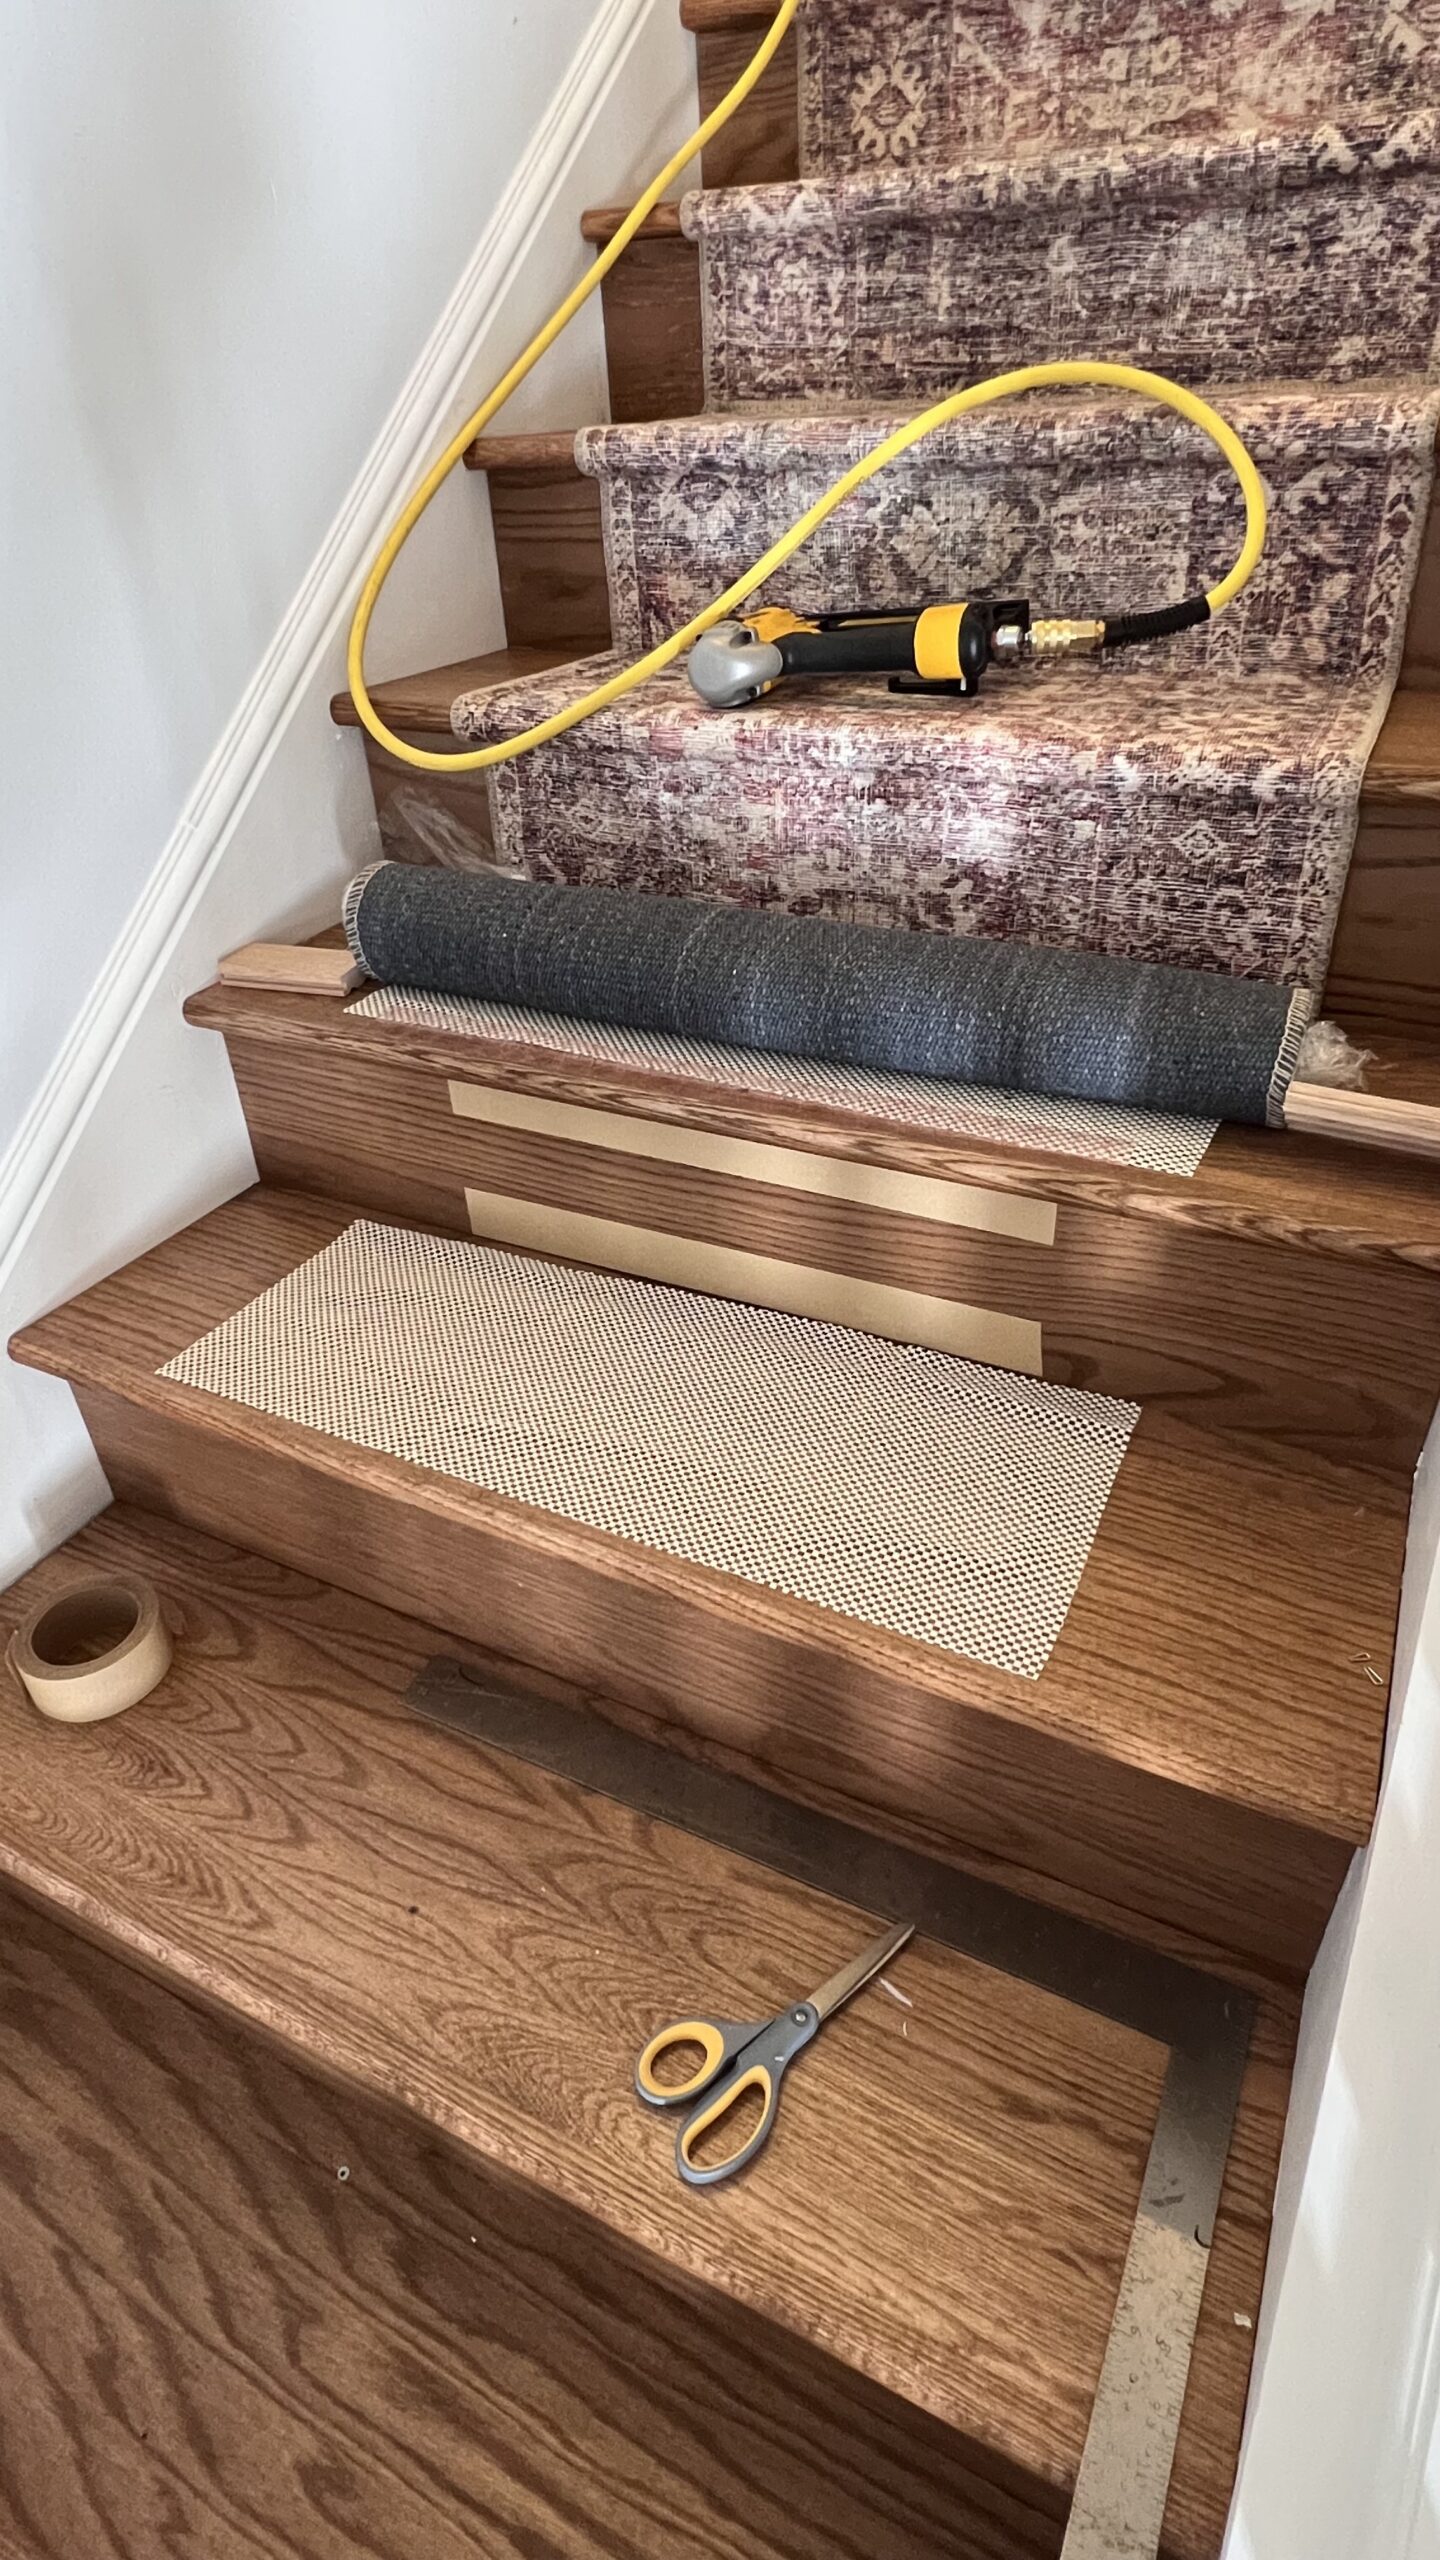
Create Spacers For Easy Installation
Just a few simple measurements are needed to create spacers. Spacers make installing a straight stair runner easy because they perfectly line it up to the step every time!
Measure the length of both your stair and your chosen runner. The difference in lengths is the size you want to make your runners so there are no gaps.
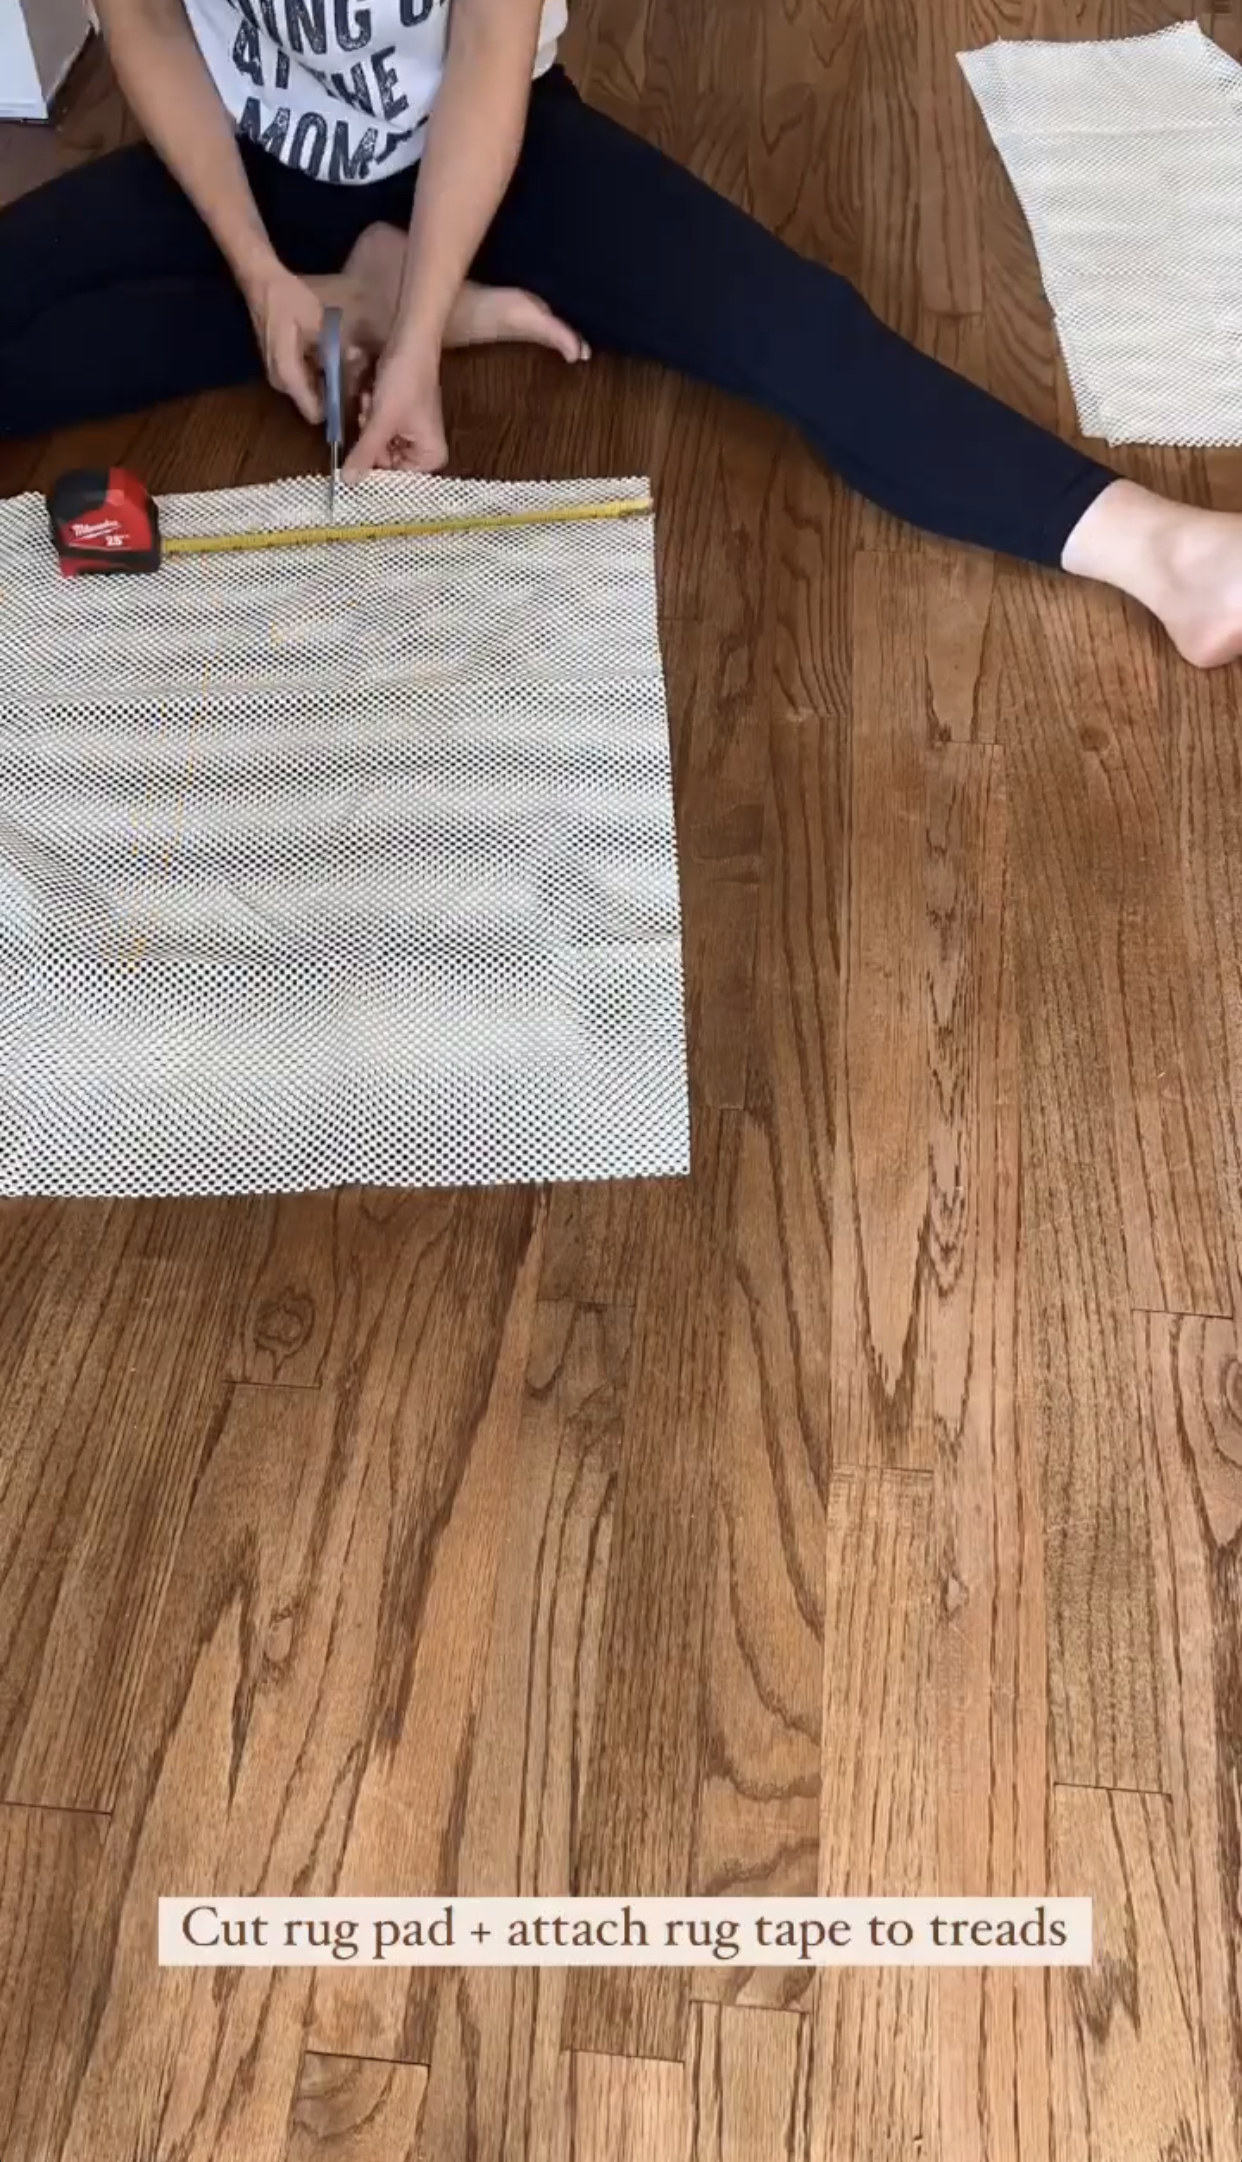
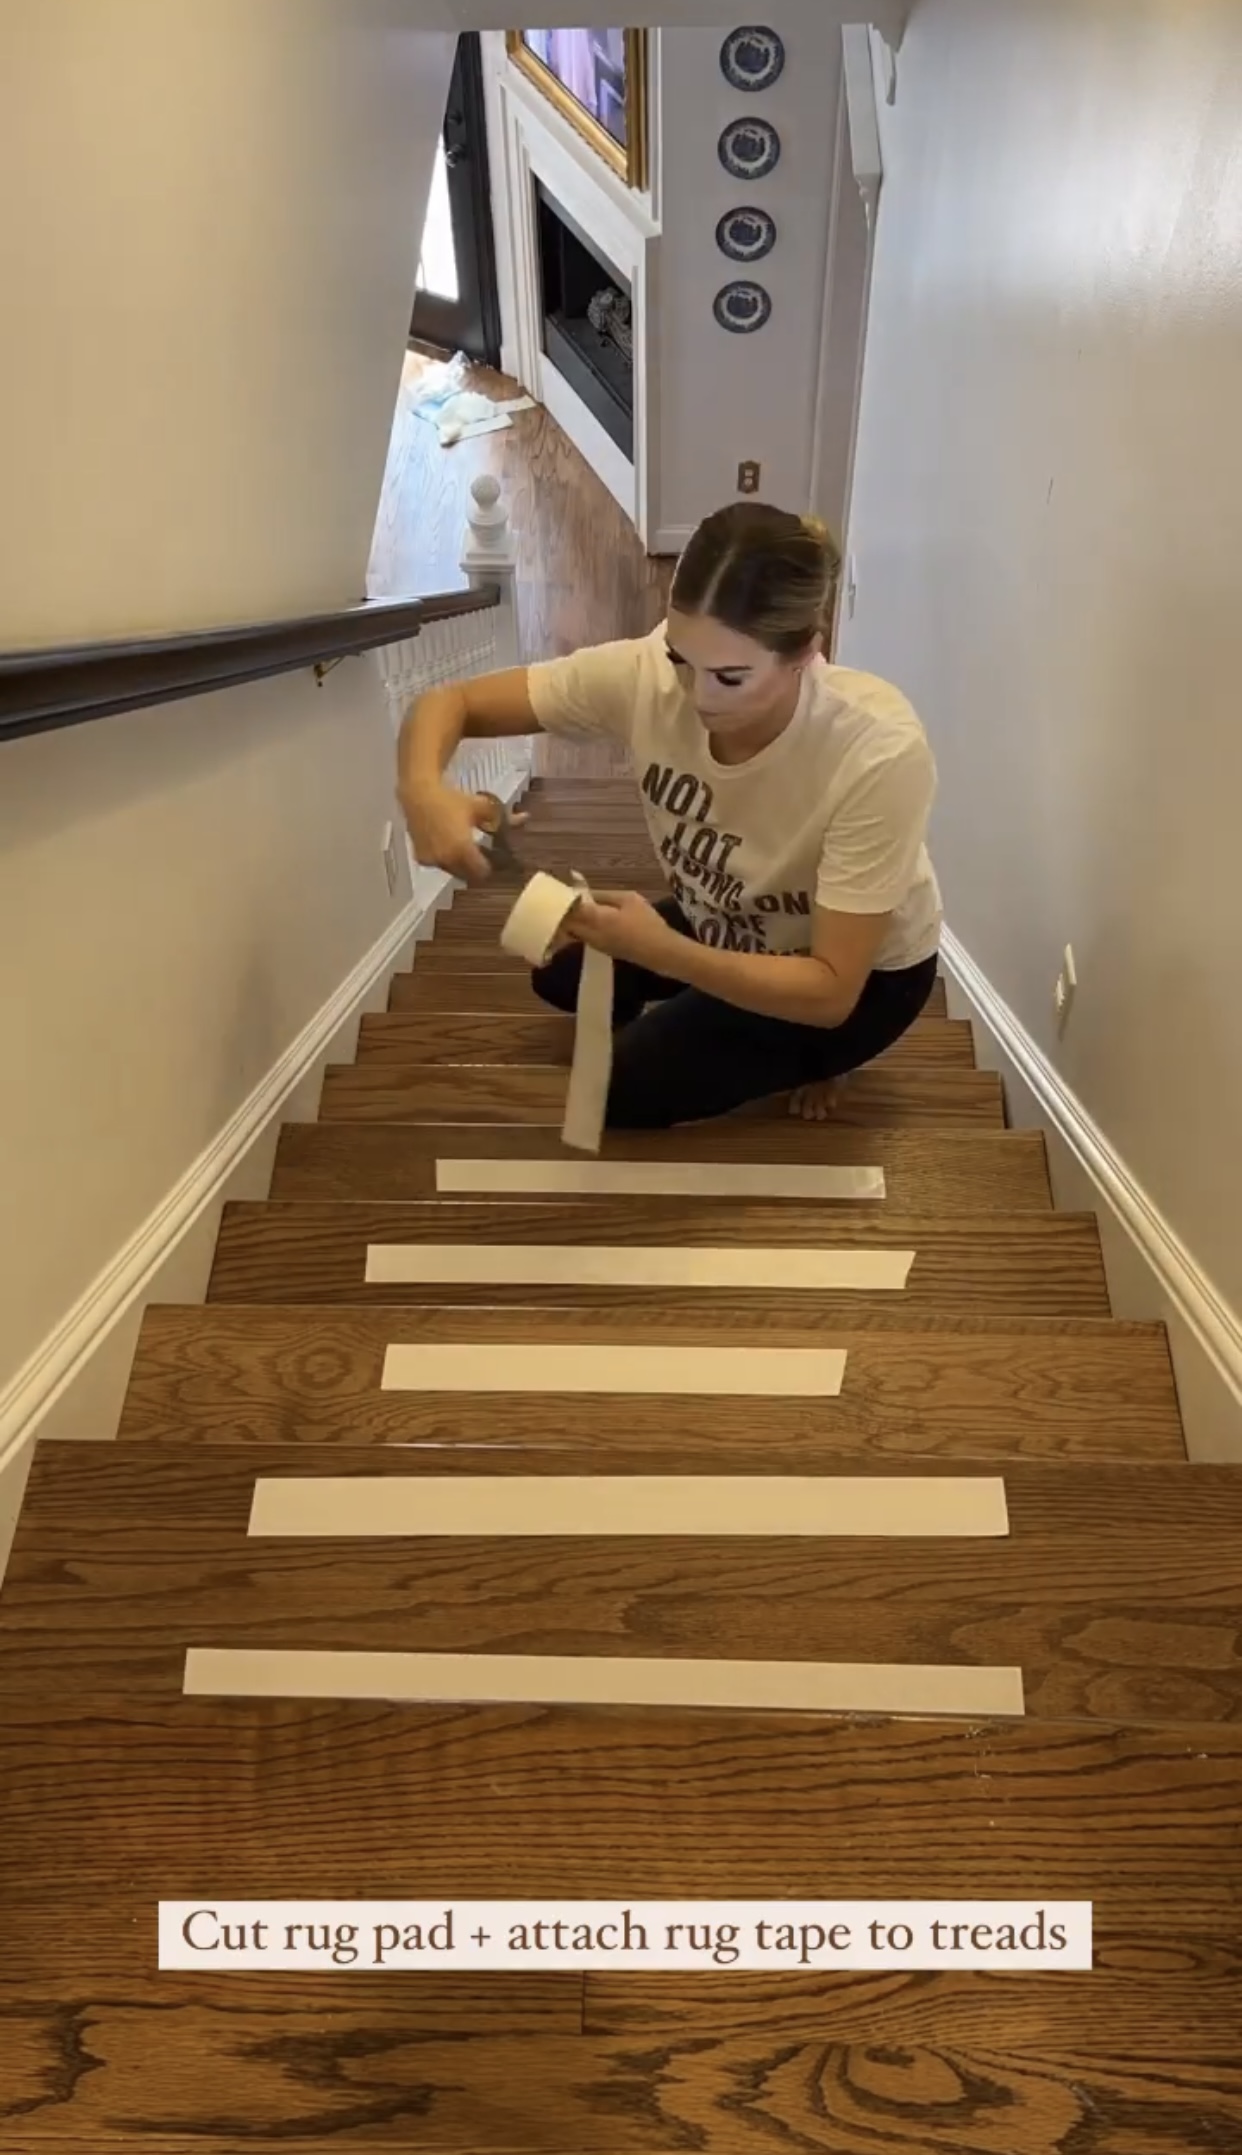
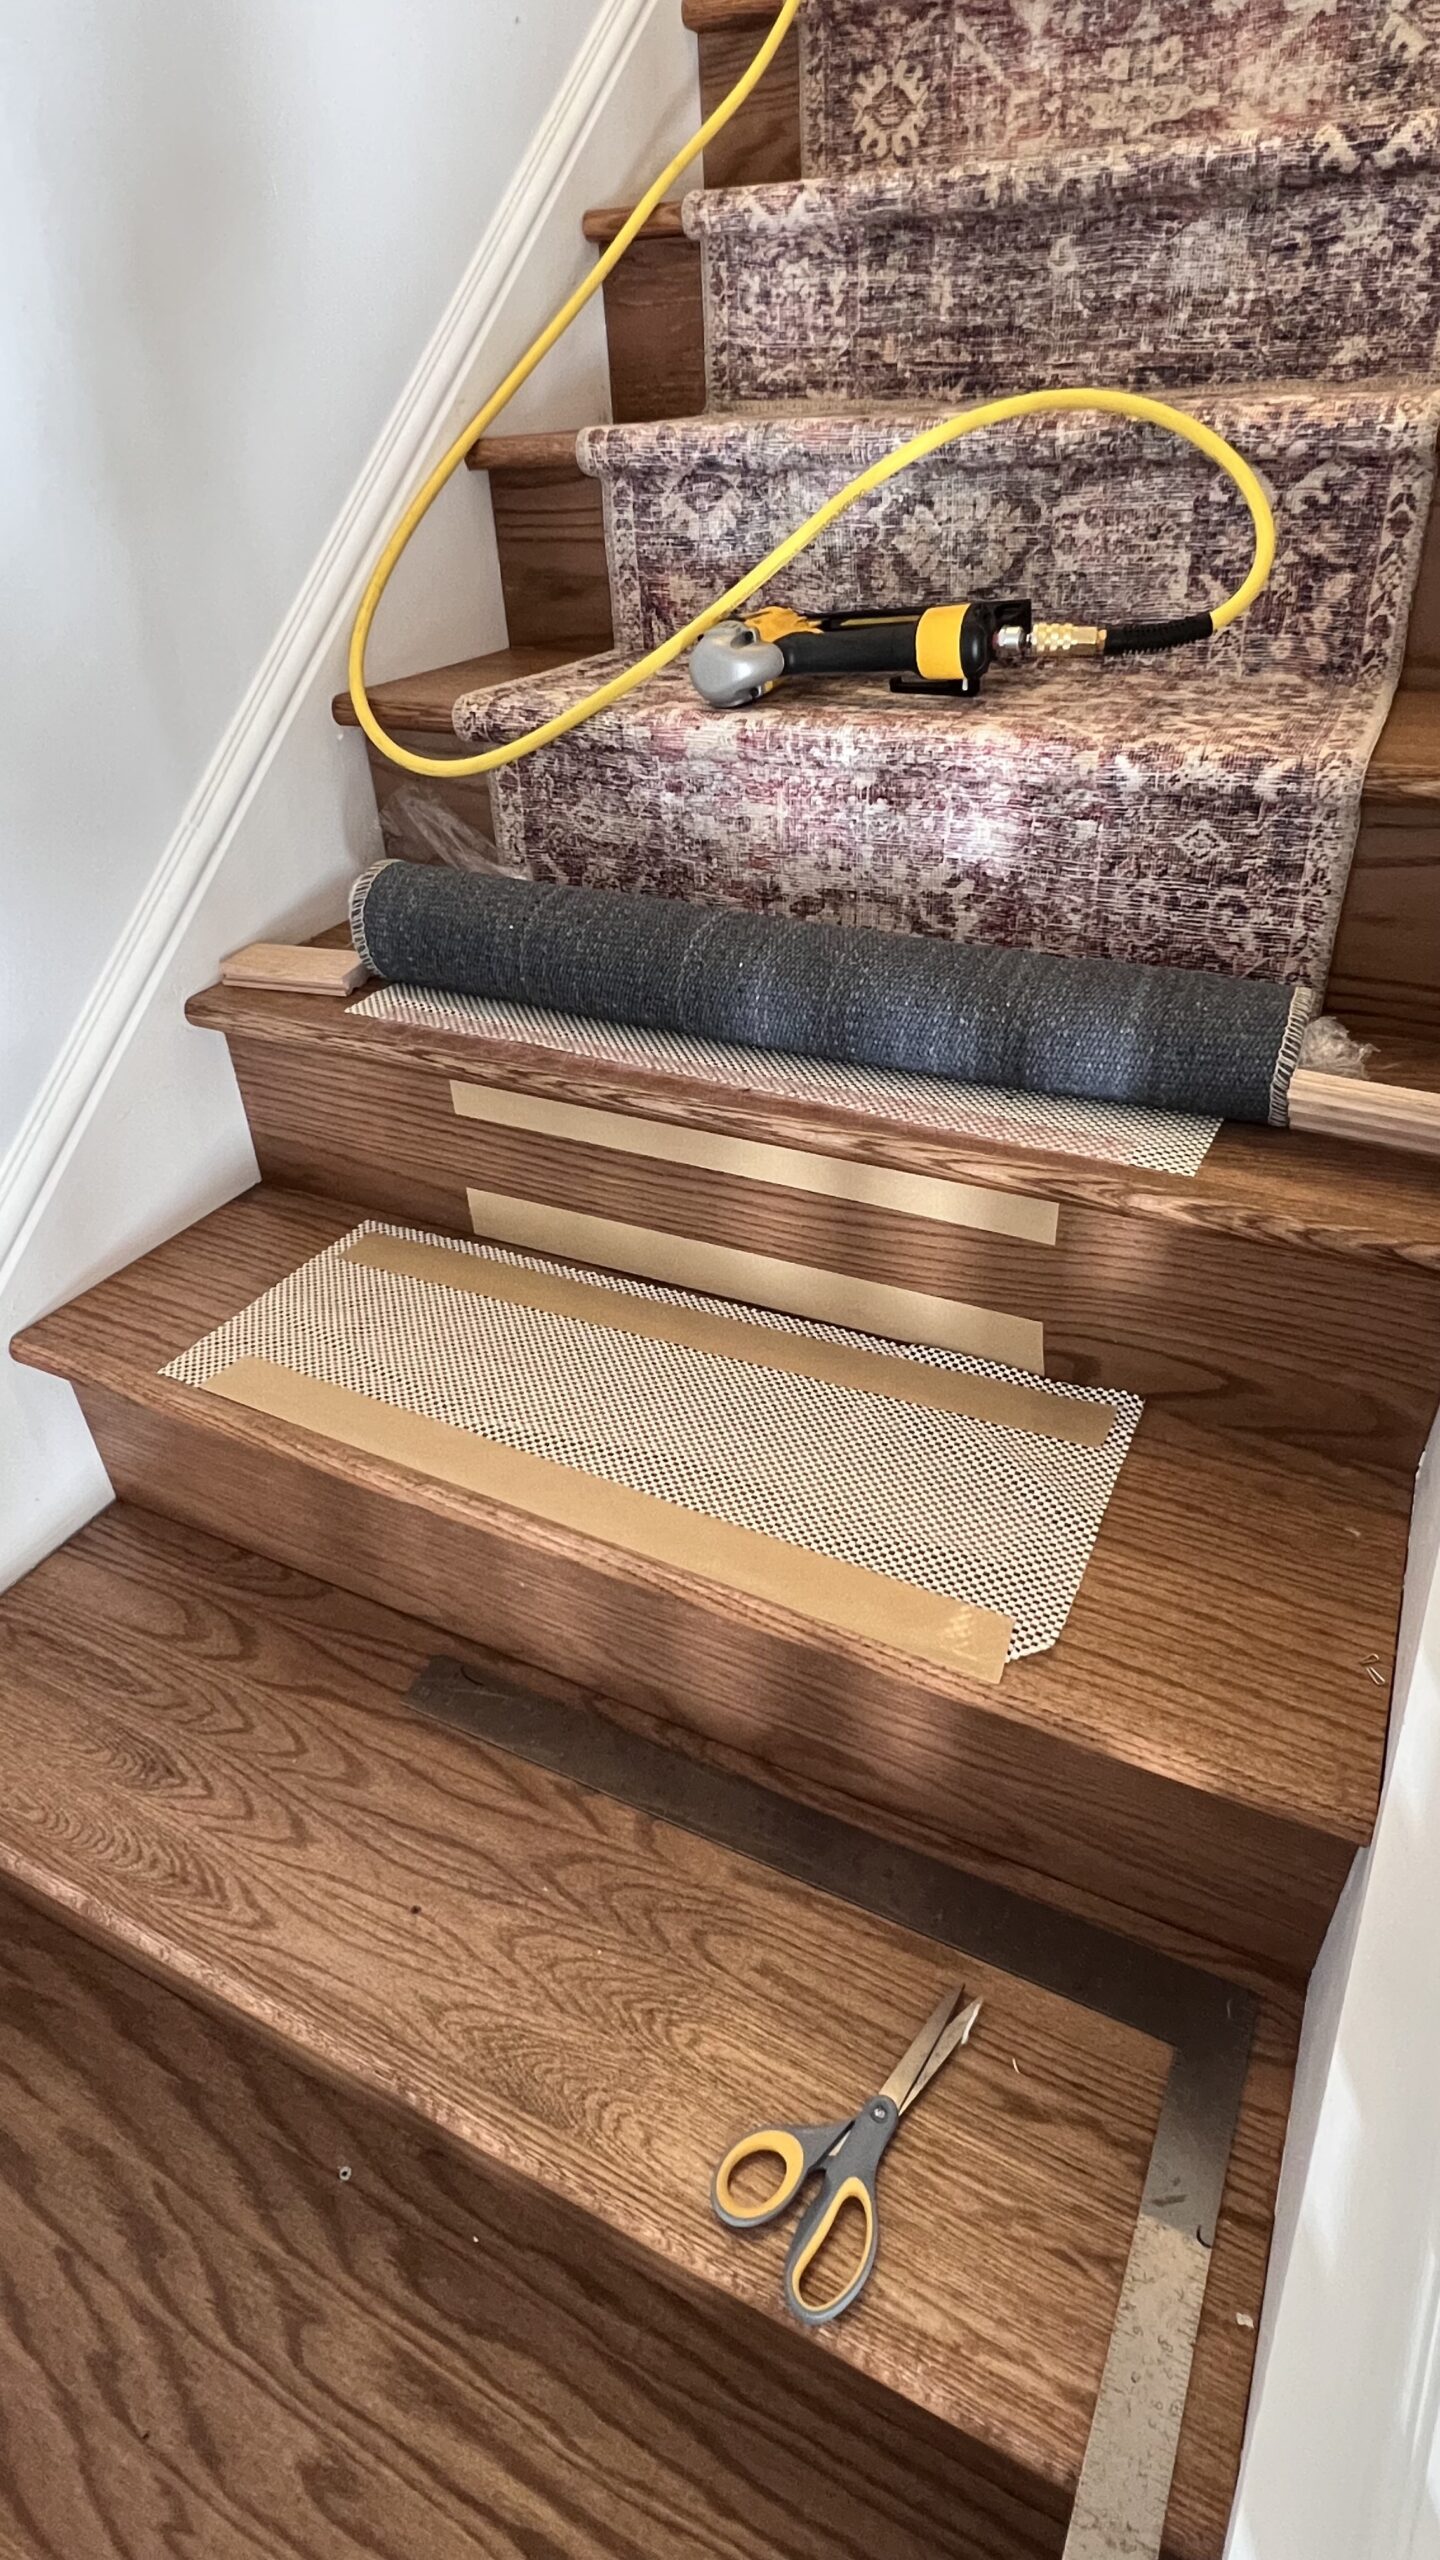
Four Steps For Each Stair
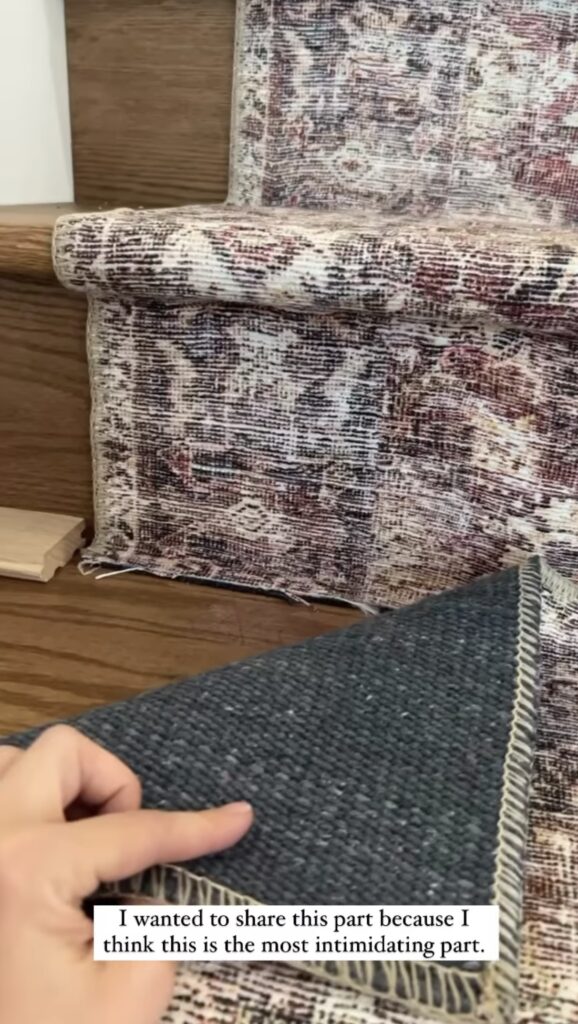
Now the prep work is out of the way, the installation process can begin! Each stair will have the same install process of four steps: rug tape, rug pad, rug tape, stair runner.
I like using rug tape between the pad and the runner to ensure that nothing will budge. With five boys running up and down it I can attest this method works!
I recommend starting by cutting up all your rug pad pieces first instead of at every step. Once the pad is cut, start to attach it to the stairs.

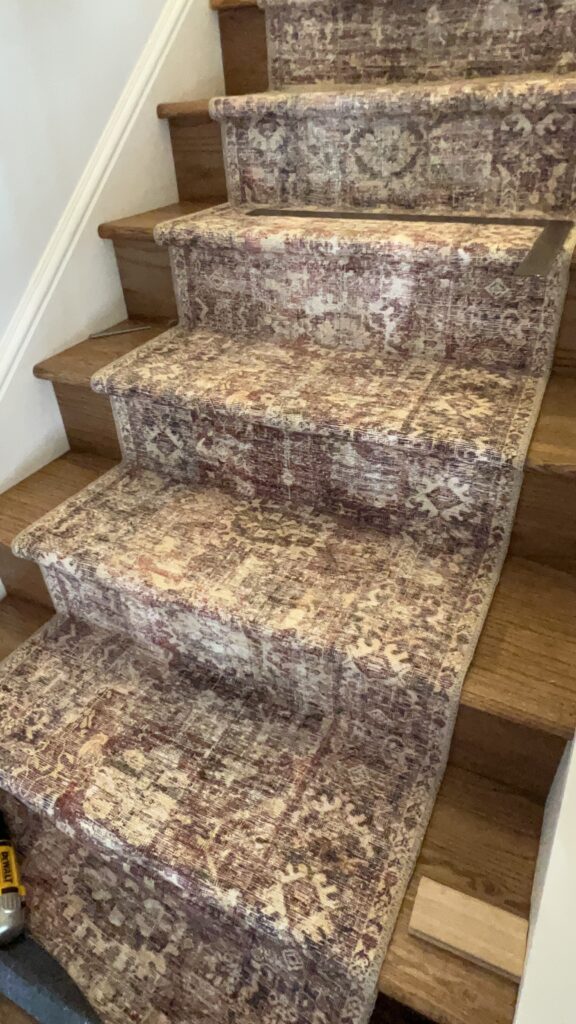
Stapling In The Stair Runner
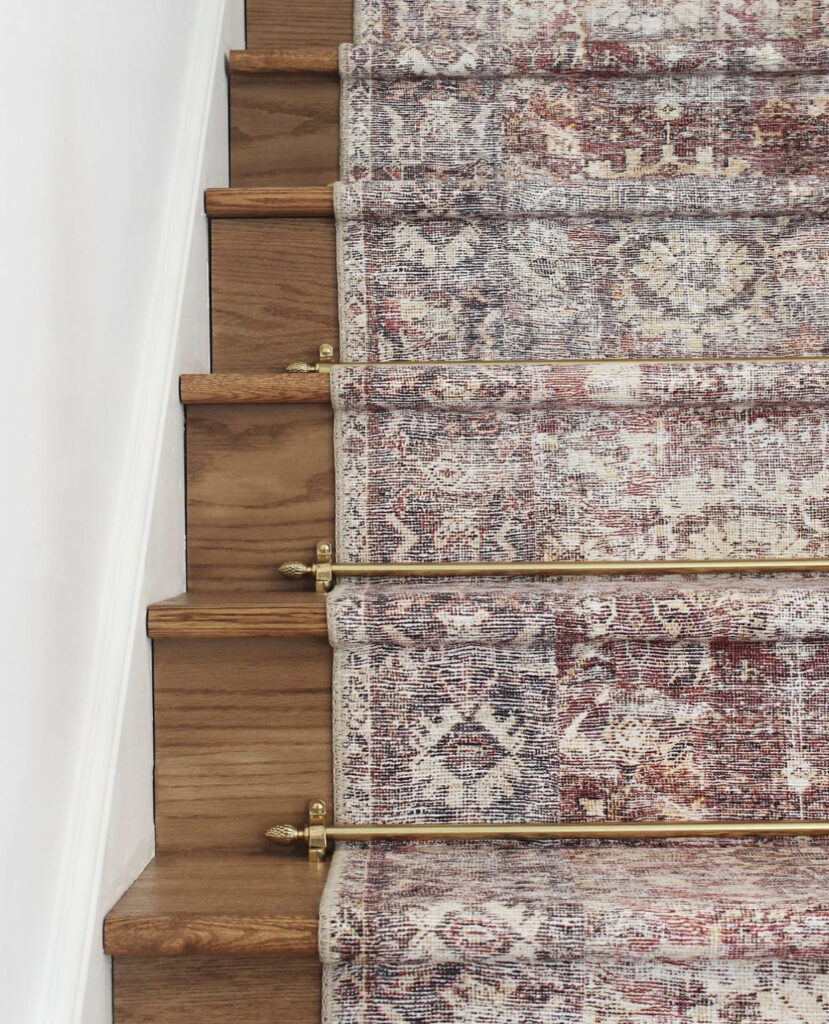
It’s now time to staple in the stair runner! I like to begin at the top of the stairs for a nice clean edge and add rug tape to every riser for additional support.
Begin by stapling the runner right under the notch that sticks out beyond the riser. Then, pull tight on the runner and add a few staples to the base of the riser.
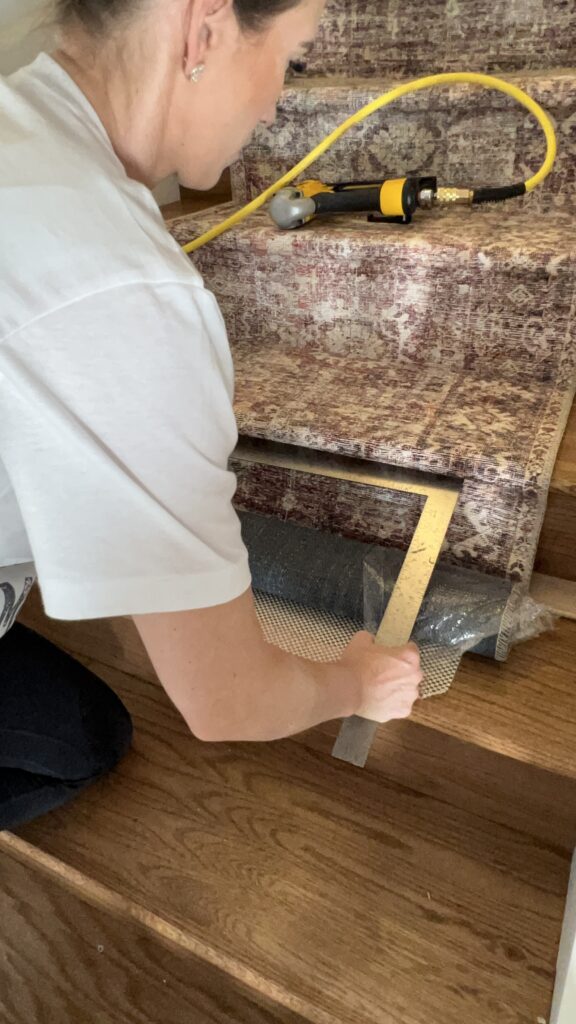
Now, you’ll reach the next step and the rug pad. Place your risers on either side of the runner and add more tape to the top of the rug pad. Pull tight and staple again underneath the notch.

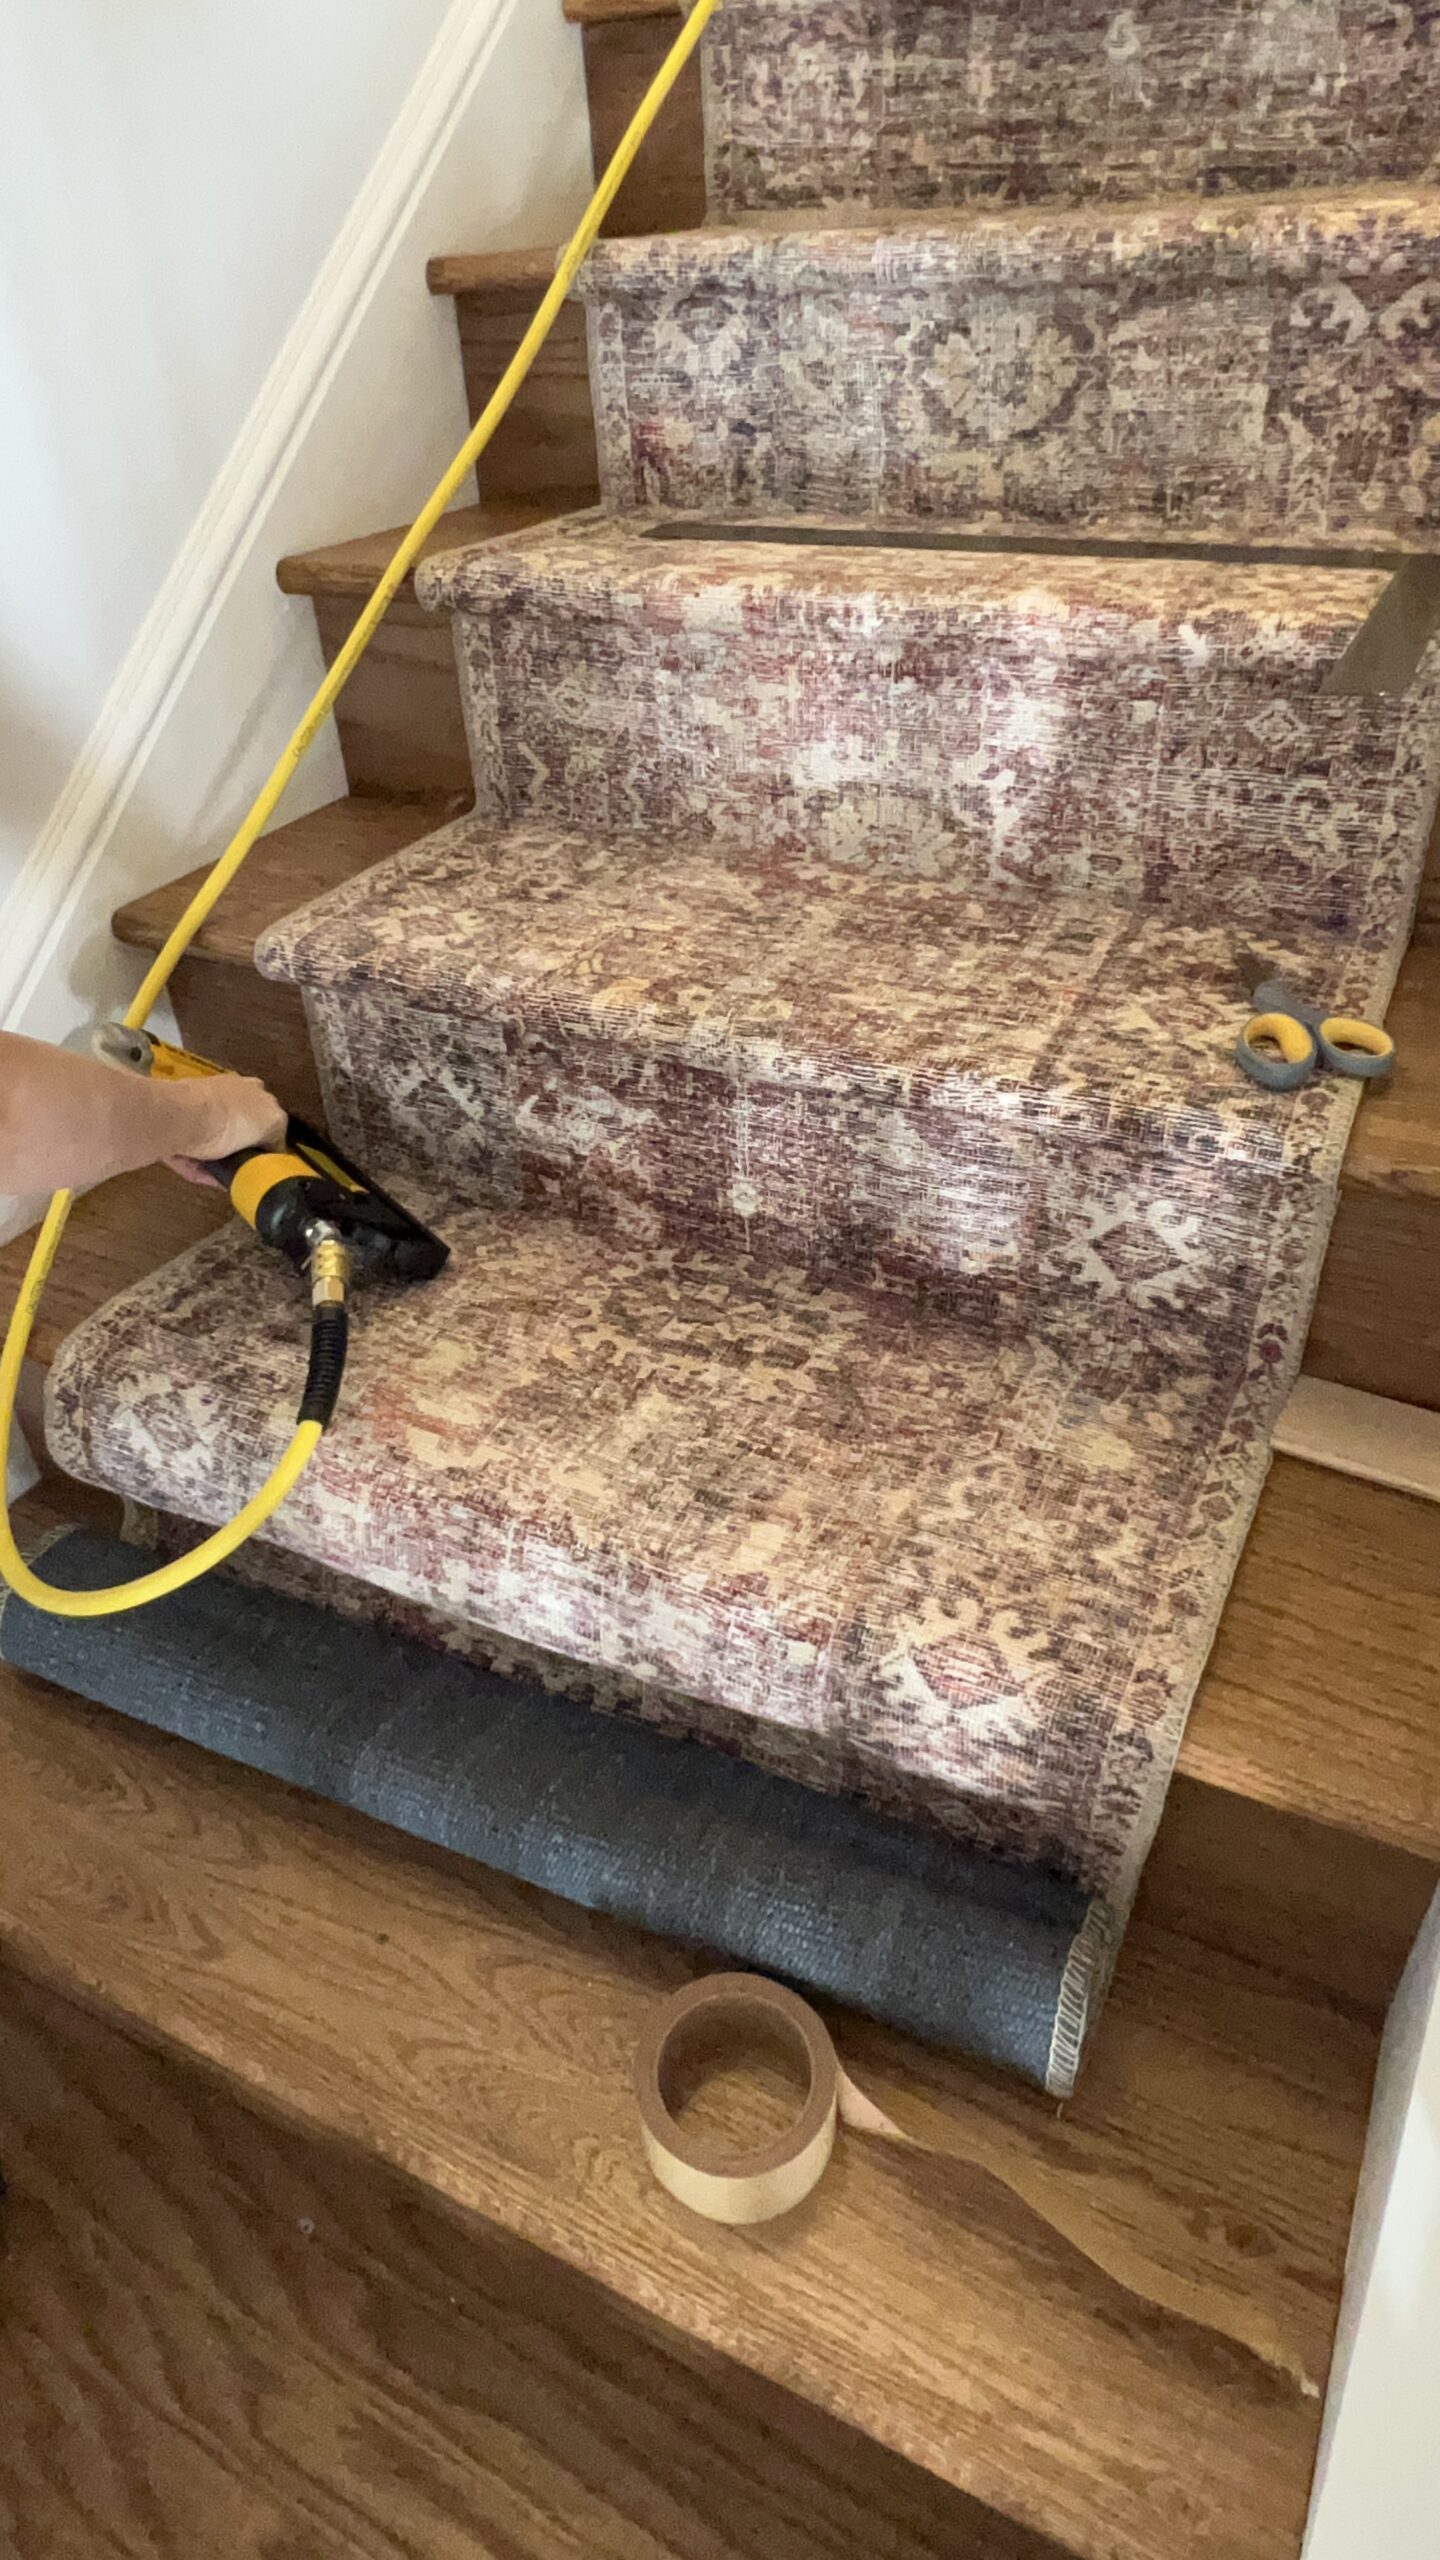
Repeat this process until you’ve reached the end of your first runner. Most likely you will need a second runner to finish this project.
To seamlessly transition between your first runner and second, I have a few tips:
- Cut the first runner so the excess is just under the nose sticking out. Tape and staple it.
- Lay your second runner down. Tape and staple it too.
Adding The Finishing Touches
When you reach the end of the stairs, cut off the excess rug. Before stapling the last piece of the rug to the bottom stair riser, carefully take a lighter to singe off any threads. I know it may sound intimidating, but this is the best method for making your stair rug look complete.
For an extra touch, I installed stair rods to every step. They brought out even more of those warm tones I love! I. am. obsessed.
Finally, your stair rug is ready to enjoy!
Our Finished Stairs
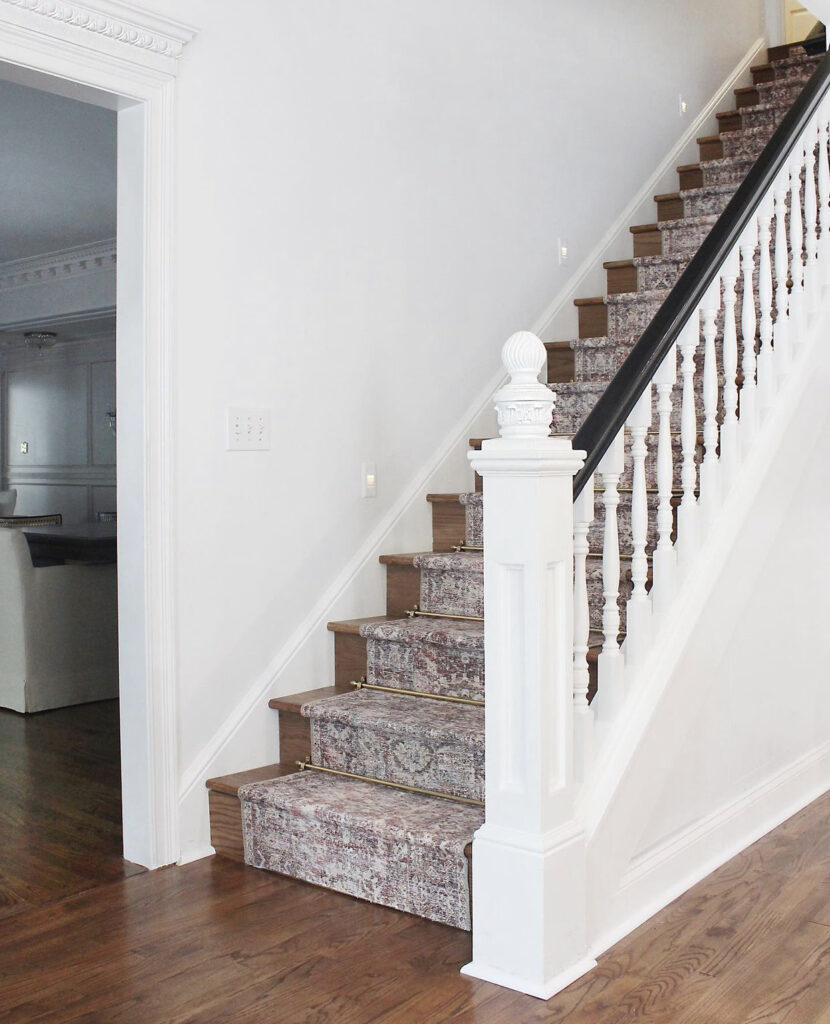
I cannot believe how stunning our stairs look now that everything is complete! It truly feels like this part of our home has a piece of my heart attached to it.
If you end up adding a stair runner into your home, let me know in the comments! And if you are wanting to find any more home inspiration, check out my latest posts:
Beautiful!! Would you consider making a post about how you cut the wood stair treads? My 1980’s house has carpeted stairs and subfloor under the carpet, I’d need to install nice treads like yours. Thank you!
I love this idea!! Let me see if I can put something together 🙂
Love this DIY, might try next week! What does the first/top stair look like? Do you start on the top tread, or go up that last riser?
Yay, love that you’re going to try it! I shared the full process in my stories so you can see exactly how I started/finished the stairs — here’s the highlight: https://www.instagram.com/stories/highlights/18083395441680160/