When it comes to interior design, the little details make all the difference. While I love these finishing touches to truly make a space feel like your own, they can be quite costly. To elevate all these touches in a way that looks deliberate, I found a gorgeous (and inexpensive) solution.
Today on the blog, I’ll be chatting about one of my favorite DIY products I always keep in my tool kit: Rub ‘n Buff. It’s been an absolute go-to of mine for a long time, so I can’t wait to share it with you all!
What Is Rub ‘N Buff?
If you’re at all interested in DIY projects, I can guarantee that you’ve heard of this finish before, but what is it exactly? Think of it like an easy way to elevate anything in your home to gold or silver. Rub ‘n Buff is a wax-based metallic finish that can turn ordinary surfaces into an even-more elevated version of themselves.
Although Rub ‘n Buff is typically used for decor pieces, I’ve really tested it on almost every surface in my home. Walls, baseboards, hardware – they all look stunning and wear incredibly well!

Where You Can Use It:
- Wall trim
- Hardware – knobs, pulls, etc…
- Frames
- Light fixtures
- Exposed metal – screws, door hinges
- Pretty much anything!

Why I Love It:
- It’s so cheap!
- You can buy Rub ‘n Buff anywhere. I usually just order it on Amazon for convenience.
- Ease of use – it’s such a forgiving product to paint on and buff out
- No fancy tools needed, just a plain old brush does the job perfectly
- No matter what metal finish you prefer, they’re got it. Gold, silver, and copper lovers are covered.
My Favorite Rub ‘N Buff Colors
As many of you know, I am a gold girl at heart. The silver and copper Rub ‘n Buff colors are gorgeous, but just not my vibe. While you may only think there’s one shade of gold out there, Rub ‘n Buff offers a ton! Here are my favorites:
Gold Leaf
Gold Leaf is the stunning, antique gold you dream of. It’s warmer in tone, but not so much that it contrasts any cool-toned paint surrounding it. If you’re a grandmillenial lover, this is the color for you.
European Gold
Think of European Gold as Gold Leaf’s cool-toned sister. This is more of a classic gold, think of it as the shade that looks great with classic or modern design styles.
How To Use Rub ‘n Buff

Rub ‘n Buff is such a simple product truly. There is no prep needed, but I do recommend a wipe-down or sanding for a better grip. To apply it, I like to use an old brush (even a makeup brush will do) and a dime-sized amount of product. Paint it on, then wait for it to dry. To buff it out, use a soft cloth and in 30 seconds it will shine.
Where I’ve Used It In My Home
I’ve tried Rub ‘n Buff on so many decor pieces, but eventually I wanted to kick it up a notch and give it a try on my walls. It works so beautifully! Although I can’t use it everywhere, any chance I get I love to add a subtle gold touch.
Home Theater
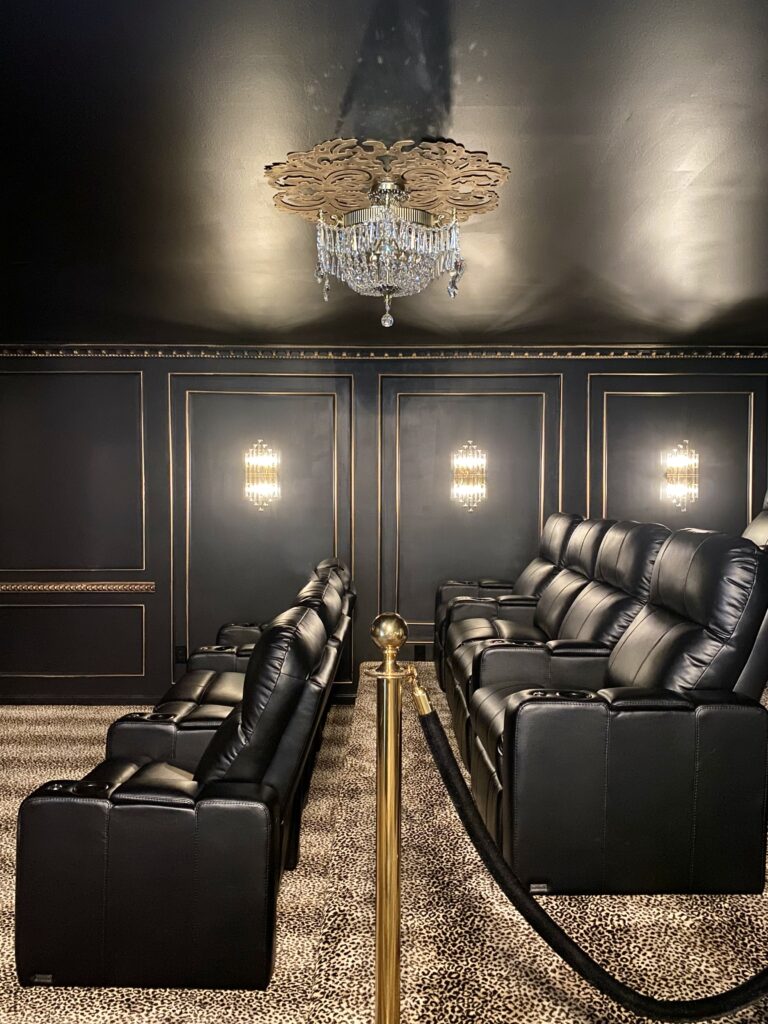
When designing our home theater, I really wanted it to feel moody and elegant. After painting the walls a gorgeous navy blue, the molding on the walls seemed to disappear. As a way to emphasize it and touch upon that old Hollywood glamor, Rub ‘n Buff was such a fun choice to work with. Although I was a bit nervous using it on the walls for the first time, years later it’s held up perfectly.
Primary Bedroom
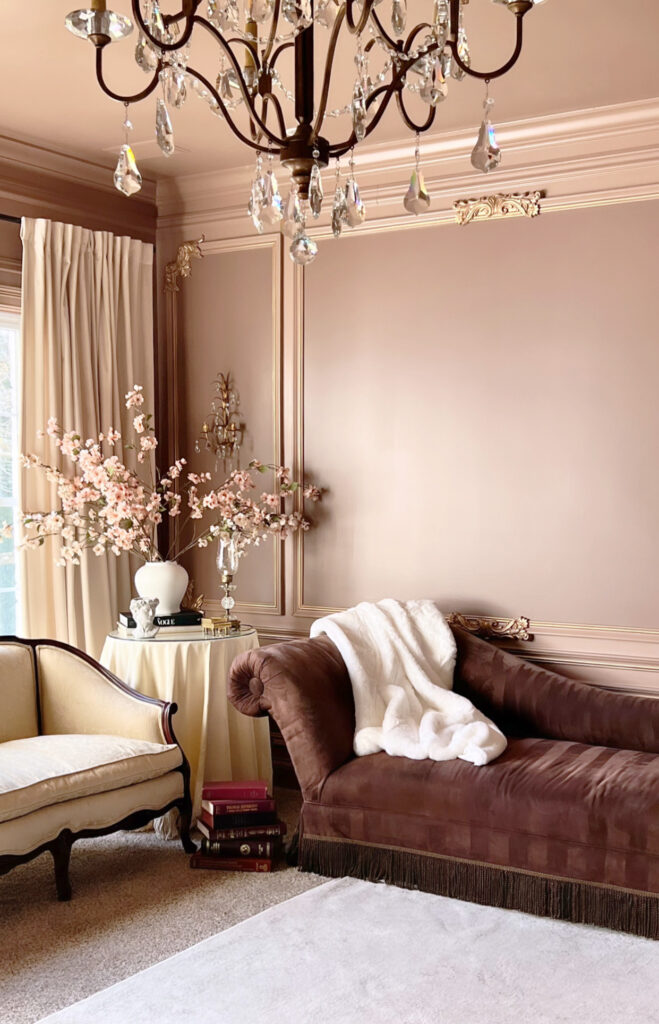
I feel quite lucky to have such an easy-going husband who lets me design all the spaces in our home however I’ve been dreaming of. For our primary bedroom remodel, I really wanted something girly with obvious nods to the grandmillenial style I love so much. With a little bit of Rub ‘n Buff, it finished the job perfectly.
Main Hallway
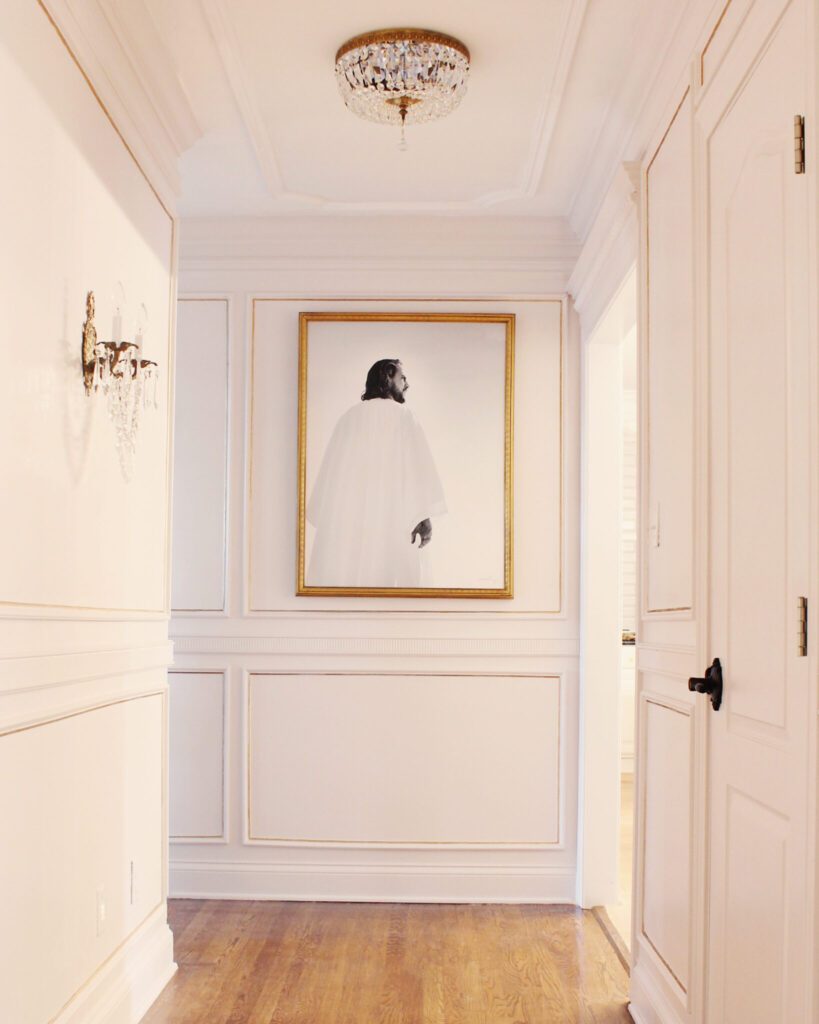
One day, I was walking through our main hallway (like I’ve done a million times before) and it just felt so boring. I was in-between two larger projects and wanted a little extra elegance. Since the base of the hallway is white, adding gold touches was such a gorgeous touch. Just like the primary bedroom, a little Rub ‘n Buff was the perfect touch.
Are you a fan of metallic finishes? Let me know in the comments! And to keep up with all the latest on the blog, check out my recent posts:
I loved this post, Mallory! The tips on using Rub ‘N Buff for different surfaces were super helpful. I can’t wait to try it out on my old picture frames for a fresh metallic look. Thanks for the inspiration!
Thank you so much!! Rub ‘N Buff is seriously magic — picture frames are the perfect place to start.