When we moved to Tennessee, I was so sad that there weren’t any flavored soda joints in town! Back in Arizona, we used to frequent Swig, a soda bar that was famous for fun soda flavors and combinations. And of course – cookies! Can’t forget Swig cookies! I need to make those soon…
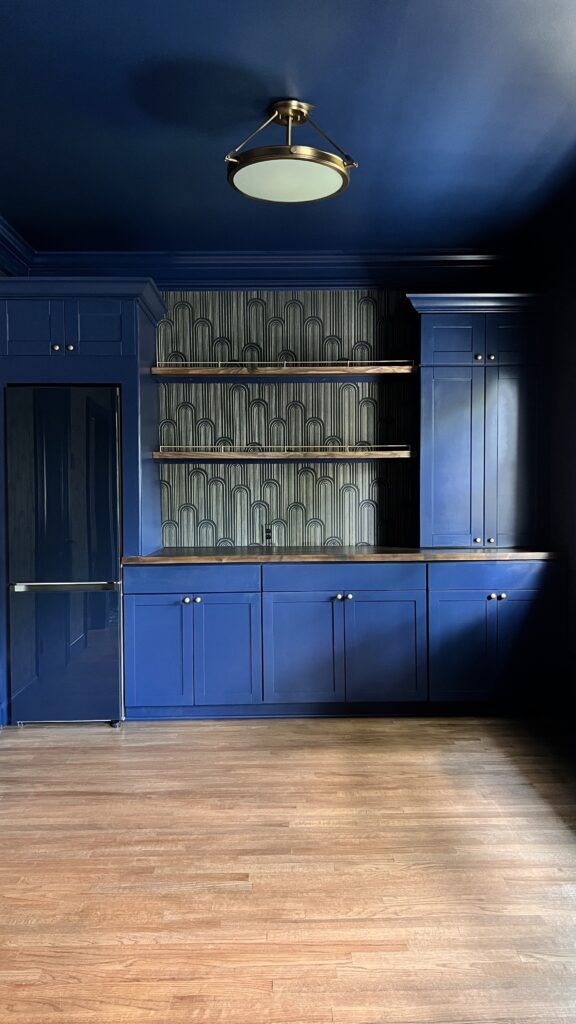
As I was planning the Billiard Room kitchenette, I knew it would be the perfect spot for a DIY soda bar to display all my favorite Torani syrups. I am getting ready to reveal the entire space THIS WEEK, so stay tuned for that!
You can check out the latest update on my One Room Challenge right here.
To see the entire room reveal, click here!
My Favorite TORANI Syrups
I’ve experimented with a lot of different flavored syrups since over the years, but none have topped Torani! They have tons of flavors and sugar free options, and I find that they mix really well soda. You can grab them from Amazon and there are SO many to try.
How I Stocked My Soda Bar
A ton of different Torani flavors like black cherry, coconut, and vanilla. (Keep reading for my favorite combinations!)
The essential mixers: Diet Coke, Dr. Pepper, Sprite, and Mountain Dew!
Coconut Creme It sounds crazy, but trust me on this. A little coconut coffee creamer or half and half in a Dr. Pepper makes for the most delicious sweet drink!
How I Made a DIY Soda Bar With Torani Syrups
It would have been easy to order a ton of Torani syrups and line them up on the counter, but where’s the fun in that?! Here’s how I made a more visually appealing soda bar for cheap.
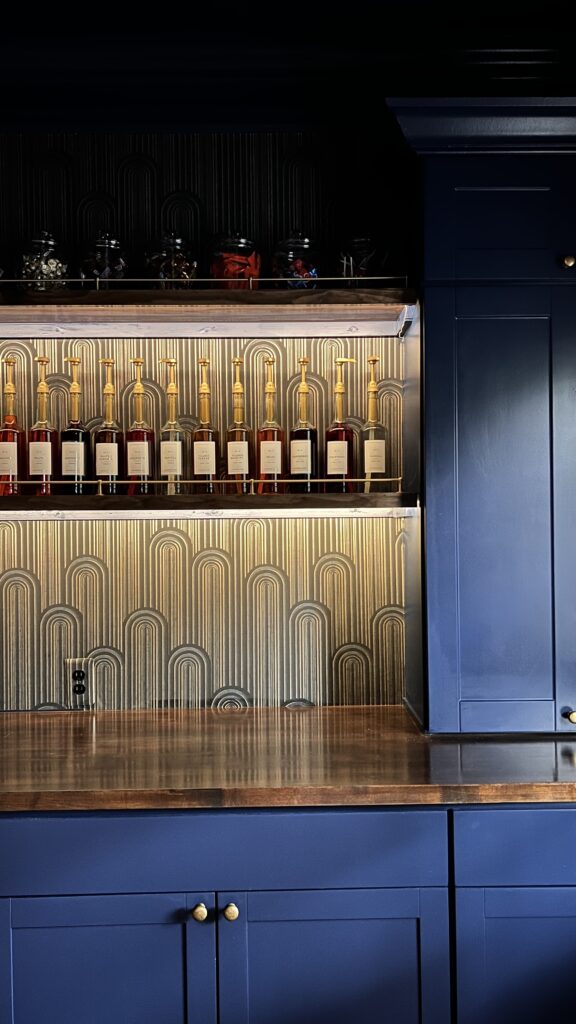
Step 1: Buy your syrups and supplies.
I first measured the billiards room bar to see how many syrup flavors I could fit. Then, since I didn’t love the look of the bottles they came in, I found some simple glass bottles and gold pumps. There are plenty of color options online, but I chose the gold pumps to match the fixtures in the kitchenette. I love the way it turned out!
Step 2: Swap out the bottles and pumps.
This step can get sticky! If you try this in your home, do yourself and favor and transfer your syrups into your new bottles in the kitchen sink using a funnel. You can thank me later!
Then, I gave the bottles a quick wipe and dry before adhering my labels.

Step 3: Create minimalist labels.
I didn’t want to risk getting syrup on the labels during the transfer process, so I saved this step for last. I bought a simple label template off Etsy, customized it for each of my flavors, and printed the labels on sticker paper. Then, I just cut them out and stuck them onto the bottles. Easy as that! I added a waterproof clear vinyl over top of the labels to make them wipeable if/when the syrups drip!
Pro tip: Use a guide to keep your labels even on every bottle. I recommend cutting out a strip of paper that you can hold up against each bottle, like a level. Then, stick the label along the top edge of your guide. That way, all the labels line up on the shelf.
Step 4: Start mixing!
Now, it’s time to get creative! Mix your own flavor combinations, or check out the Swig menu for inspiration. My go-to is a Dr. Pepper with vanilla and half & half, but the possibilities are endless!
Swig Menu Inspirations:
- Dr. Pepper + Coconut + Vanilla
- Mountain Dew + Peach + Strawberry
- Ginger Ale + Cherry
- Sprite + Lemonade + Blue Raspberry
- Root Beer + Butterscotch + Half & Half
- Diet Coke + Coconut + Fresh Lime
We aren’t strangers to Torani syrups, so I know this soda bar is going to get a ton of use in our house! ! If you make your own Torani syrup concoctions, be sure to tag me on Instagram. I’m always looking for more flavor combo ideas!
Billiard Room Kitchenette Cabinets & appliances Sources:
Cabinet color: Behr Compass Blue
- Base Cabinets – I used (2) 30″ and a 36″
- Tall Upper Cabinet – Mine is 30″ wide x 42″ tall
- Butcherblock Countertops – Stained Dark Walnut
- Small Bridge Wall Cabinets (I used two!)
- Cabinet Pulls
- Drawer Dividers
- Blue Freezer, Fridge
- Microwave
- Cabinet Drawers (11″)
- Cabinet Drawers (14.5″)
- Trash Pull Out
Billiard Room Kitchenette Decor Sources:
- Flooring (linked in this post!)
- Wallpaper
- Flush Mount Light
- Bistro Table
- Bistro Chairs
- Wine Glass Rack
- Shelves are made from 1″x10″x8′ Pine Board from Home Depot. Sanded and stained Varathane Dark Walnut, sealed with Polyurethane
- Brass Rails supplies
Billiard Room Kitchenette Sources:
- Syrup Bottles
- Gold Pumps
- Custom Labels – template
- Gold Foil
- My Laser Printer
- Sticker Paper for Labels
- Laminator
- Clear Sticker Paper – this makes your labels waterproof – I just cut a square of the clear and put it right over top the labels. I’ve run it under water and its totally sealed!
- Popcorn Supples (Seasonings, Bowls)
- Candy Jars
- Clear Candy Bins
So cute! You are amazing! Can you link the labels to the Etsy shop? The link doesn’t seem to work.
Of course! Here they are!
https://rstyle.me/+SAFDwMJVnpvfaNdaAyDyRg
I love all of your content. Thank you for keeping it real and pushing through the tough days. I look forward to your posts!
You’re the sweetest. Thank you!!
Mallory! You have out done yourself and want to do something similar to my media room area! Thanks for the inspiration! I don’t see the link to the water proof labels. Do you mind sharing those? Also, do you have a link for the little gold bars in the candy cabinet?
Well done!
THANK YOU!!! You are the best. I just added the links to the bottom of the post.
This project is incredible! Would you mind linking the under cabinet LED stick on lights?
Hi Nikki! I totally would but the batteries in them have been draining constantly! I have been replacing the batteries every 2 days haha. They gotta go!