Want to switch up your kitchen without doing a complete remodel? Consider painting kitchen cabinets!
While everyone dreams of completely remodeling their kitchen at one point or another, it’s often not feasible to start completely from scratch. If you want to make a noticeable change to revamp the heart of your home, your kitchen cabinets are a great place to start.
Today on the blog, I’ll walk you through a step-by-step guide to painting kitchen cabinets without fuss! While this DIY may seem intimidating to tackle, I promise with patience, you can make your kitchen cabinets look professionally painted.
Why Paint Kitchen Cabinets?
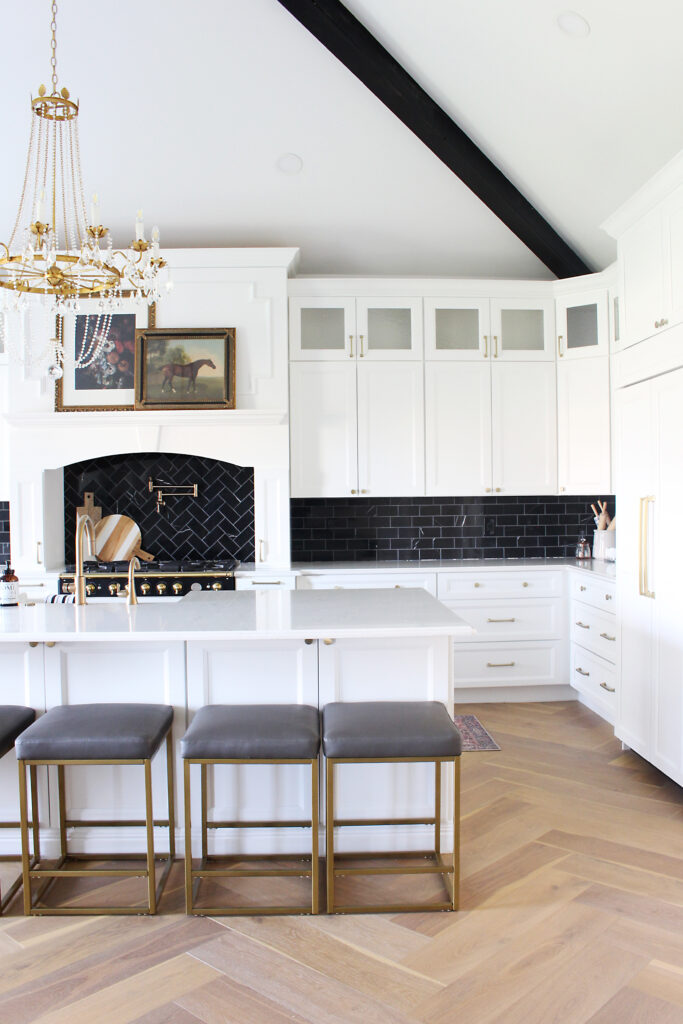
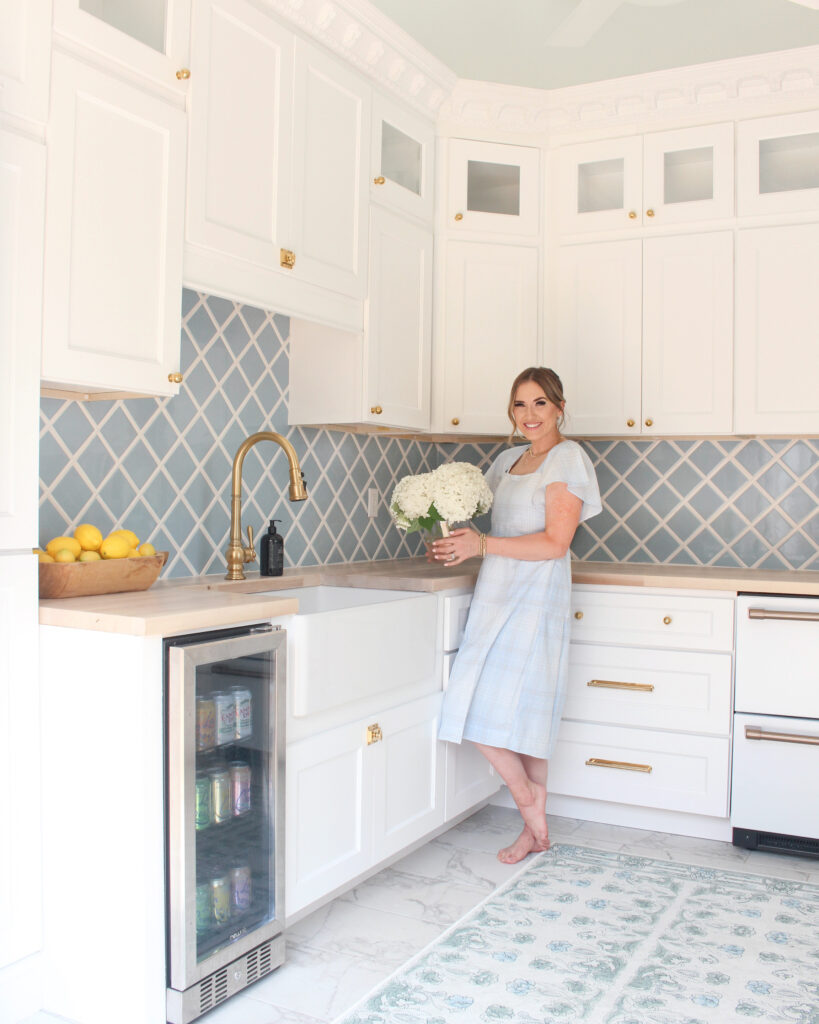
Painting your kitchen cabinets is a fantastic way to refresh your space without the expense and hassle of a full renovation. Cabinets take up a lot of visual real estate, so updating their look can dramatically change the overall feel of your kitchen. Plus, it’s a more budget-friendly option compared to replacing cabinets entirely.
No matter what your specific interior design style is, a fresh coat of paint can help you achieve your desired look. It’s a project that can breathe life into your kitchen and make it feel like a brand-new space.
Is This A Project I Can Actually Do Myself?
Absolutely! Painting kitchen cabinets is a DIY project that many homeowners can handle with a bit of patience and the right tools. You don’t need to be a professional painter to get great results. The key is in the preparation and taking your time with each step.
After painting kitchen cabinets and learning all the ways you can mess them up, I created this guide to ensure you can paint your cabinets without fear of messing up. I promise, all you need is patience to work through each step fully and they will look brand new.
What Kind of Paint Should I Use?
Choosing the right paint is crucial for a durable and beautiful finish. For kitchen cabinets, you’ll want to use a high-quality paint that can withstand frequent cleaning and daily wear and tear. Look for paints labeled as “cabinet paint” or “trim paint,” which are designed for high-traffic areas.
Typically, a semi-gloss or satin finish works best because it’s easy to clean and provides a nice sheen without being too shiny. If you’re curious to read all about each paint finish, check out my post – Paint Finish FAQs here!
Tools Needed To Paint Kitchen Cabinets:
- Screwdriver to remove hardware
- Liquid sandpaper + microfiber cloth
- Orbital sander
- Primer of choice
- Sheet / temporary surface to lay cabinets on
- Paint sprayer (or roller if you prefer)
- Paint!

How To Paint KITCHEN Cabinets:
- Remove all the hardware
- Prep! Prep! Prep!
- Prime your cabinets
- Lay out cabinets on sheet / temporary surface
- Load up your paint sprayer and go for it!
Step One: Remove All The Hardware
This is a super easy first step, but removing all hardware helps to ensure you’re getting a smooth, even coat of paint like the professionals do.

At this point, you could also choose to repaint your hardware as well! If you’re wanting a metal finish on your hardware. check out my post on how to do it for cheap using Rub ‘N Buff here.
Step Two: Prep! Prep! Prep!
It is so tempting to dive into painting your cabinets, but the truth is you need to prep them first! Using liquid sandpaper, I scrubbed the surface with a microfiber cloth to make the cabinets as smooth as possible for the perfect finish. You can also sand them down with an orbital sander, whichever you would personally prefer.

On this project, I did a combination of both to get them super smooth. If you really take the time to prep, the actual painting of the kitchen cabinets is a breeze. If you’re looking at painting older kitchen cabinets, this step is crucial to get rid of any varnish, grease, etc…
Step Three: Prime Before Painting Kitchen Cabinets
Priming is another one of those tedious prep steps, but it’s so necessary to ensure your paint is even and lasts for years.

If you’re like me and don’t love to roll paint or primer on, the Kilz Spray Paint Primer is a great product to have on hand. I’ve used it so many times over the years for painting cabinets. and it truly helps the paint adhere and stick to the wood.
Step Four: Lay out cabinets on sheet / temporary surface
If you’re like me, you’ve thought about throwing your project onto the grass and painting it will work just fine. Wrong. Laying out a sheet or temporary surface ensures no dirt, grass, or anything else touches your cabinets as they dry. This is how DIY projects can truly look professional.

At this point, you can decide whether spraying or rolling your paint will be a better application process for you. If you’re curious if paint spraying would be best (it’s my personal favorite), check out my post on paint sprayers here!
Step Five: Time For Paint!
Finally! Load up your paint sprayer (or pour) with your favorite paint color and get to work. The way to do any painting correctly is to apply light, even coats. The worst thing you can do is overspray / overpaint on the first coat. Two solid, even, light coats are significantly better than 1 heavy coat. You’ll see a ton of build-up.

Once they dry fully, flip each cabinet over and spray the other side. This project will take a little bit of patience to ensure the result is even and without any bumps, but it’s so worth it! Painting cabinets can look professional, it’s all about making sure each layer is fully drying in a clean space.
Ready To Start Painting Your Kitchen Cabinets?
With the right tools, patience, and preparation, painting your kitchen cabinets can be a rewarding DIY project. With these steps, you can achieve a professional finish and a refreshed kitchen look.
Do you have any questions before starting to paint your kitchen cabinets? Let me know in the comments!
Do you paint inside your cabinets?
I did not this time!
This is sooo amazing and inspirational! Quick question, did you only order the cabinet door fronts or did you also order the cabinet frames itself? If you built the cabinet frames itself do you mind sharing how you did that or tutorial that you might have watched that you recommend? Thank you for all the inspiration!
Great question – I’m going to add this to the post! But yes, I ordered the entire cabinet and then removed the doors the paint them.
Does this work if you have a laminate covered doors? Our door fronts feel so cheap and light. They are covered in a laminate sheet I am pretty sure and just curious to see if this process works for that as well because I would love to give our cabinets a new look!
You definitely can paint laminate cabinets but they don’t hold on to the paint as well. If you have some budget to allocate to this project, you can get order new cabinet doors (in ANY color!) and keep your existing boxes! It’s pretty amazing! I know this can be done by Semihandmade and another company called https://www.nieucabinetdoors.com!
Hi! What kinda of paint do you recommend (sorry if I missed it listed somewhere)? Does rolling look as good? Thanks!
I love using Sherwin Williams pro classic or Sherwin Williams Emerald paint for cabinets! I like spraying better than rolling, but I’ve done both. Sometimes, depending on your space and cabinet shape/layout, rolling is great as well!