Finally, our home feels like it’s beginning to come together! After MONTHS of not having music in our home, the piano is in and this space has come to life once again. I wanted this space to feel extra special, so I added a touch of drama with a wallpaper mural on the ceiling! It was the perfect finishing touch to make this room feel like ours.
Today on the blog, I’m chatting all about the wallpaper mural on our ceiling that truly transformed our piano room! With less than two hours, Craig and I created this gorgeous, but still subtle, print that makes this space come to life.
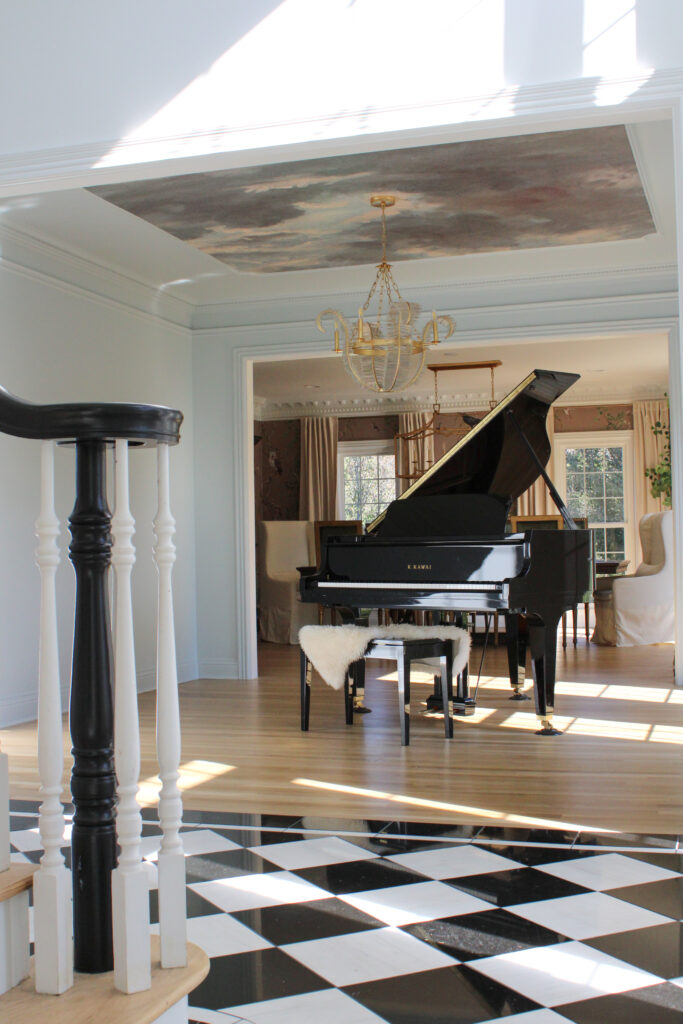
Our Empty Piano Room Needed Some Life!
After five long months without piano music, we got word our piano was finally on its way! We have this little entry space that just begs for something beautiful, and while it’s the perfect spot for the piano, it still needs an extra touch of love. I’d been hanging onto this moody wallpaper for ages, one that looks like a swirl of abstract clouds—just waiting for the perfect place to shine.

With other projects in the Monarch Colonial Renovation stealing all of my focus, putting a wallpaper mural on the ceiling kept getting pushed back…until two hours before the piano delivery. Yep, two hours! This room has crown molding that creates a kind of built-in frame, so the ceiling just needed an extra touch of something stunning.
Here’s how it all came together and some tips if you’re feeling inspired to add a wallpaper mural to your ceiling too!
How To Create A Wallpaper Mural:
Gather the Tools You’ll Need:
For a project like this, you’ll need some essentials: wallpaper, wallpaper paste, and a laser level (especially if your design isn’t abstract and needs precise alignment). A step ladder and wallpaper smoother are also must-haves!
Prep Your Space:
Clear the area beneath where you’ll be working—especially important if you’re on a tight timeline before something big (like a piano) arrives. Having space around you makes a world of difference when working overhead.
Align the Mural with Molding for a Framed Look:
If your ceiling has boxed or crown molding, it can act like a natural frame for the wallpaper mural, highlighting it as an art piece. The molding edges make it easier to line up your wallpaper, giving a finished look with minimal hassle.
Apply the Wallpaper:
Starting at one end, apply the wallpaper to the ceiling carefully. This part is definitely a two-person job if you’re working against the clock! Use the wallpaper smoother to press out air bubbles as you go along for a flat finish.
Final Touches and Let It Set:
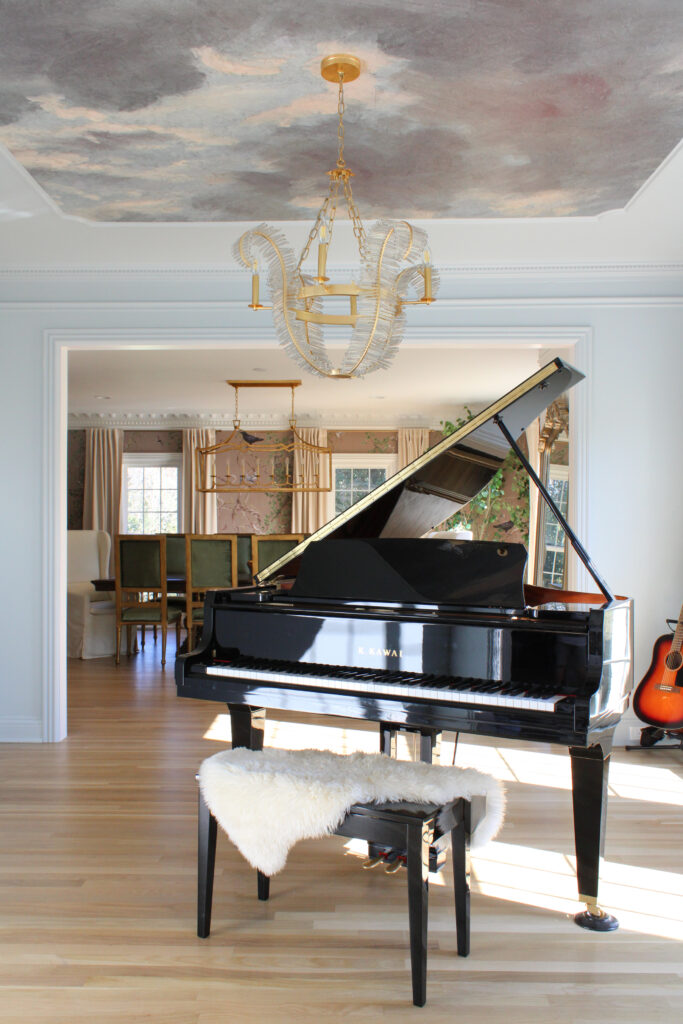
Once it’s up, let the wallpaper set according to the paste instructions. Stand back and take in the new life added to your ceiling! At this time, we installed this gorgeous palm crystal chandelier and the overall look was complete.
Common Wallpaper Q + A’s
As someone who loves wallpaper enough to create their own wallpaper line, I’ve dealt with it all when it comes to wallpaper challenges. Here are some of my top tips for installing a wallpaper mural specifically:
What Kind of Print Is Best for a Wallpaper Mural?
For a ceiling mural, you’ll want a design that brings the eye up without feeling overwhelming. Abstract designs like cloudy patterns or soft geometrics work beautifully for ceilings, as they add visual interest without drawing away from other decor or making the room feel too busy. Moody tones or soft gradients can add depth and a touch of drama.
Is Peel and Stick or Standard Wallpaper Better?
Both types work, but each has its own pros and cons. Peel-and-stick wallpaper is easier to remove, so if you like to change things up or are renting, it might be the way to go. But for ceilings, standard wallpaper with paste tends to be more reliable, as it adheres more strongly over time, which is important when gravity is working against you! Just make sure to follow the paste instructions carefully to get the best results.
Does The Height Of The Room Matter When Considering A Ceiling Mural?
Yes, the height of the room does matter when considering a ceiling mural. In rooms with high ceilings, a mural can make the space feel a bit more grounded and add visual interest without overwhelming. In lower rooms, though, bold or dark designs can make the ceiling feel even closer, so subtle or lighter patterns might work best to avoid that effect. Ultimately, it’s about balancing the mural style with the room’s proportions to enhance rather than overpower the space.
With just a few hours, a bit of patience, and some teamwork, we transformed this room. Now, with the wallpaper mural bringing a little extra life to the ceiling, the piano room feels like a complete, cozy space—a perfect little spot to enjoy music and admire a sky-inspired view above. If you’re thinking about a wallpaper mural for your ceiling, I say go for it! It’s a project with a big payoff for a small space.
Do you have any questions on how to make a wallpaper mural? Let me know in the comments! And to keep up with all the latest on the blog, check out my recent posts:
Leave a Reply